GTA Online Heist Guide: How to complete the classic heists
In our guide to the heists of GTA Online you will learn:
- What the respective heist is about
- Which preparation missions you have to complete
- Which player skills are necessary for certain sections
- What conditions you need to fulfill for the elite challenge
- How the final mission of each heist plays out
No less than five heists came into the game with the update of the same name back in 2015, but are still considered one of the biggest challenges in GTA Online (). In our guide you'll learn how to complete the preparation missions and the final heist, and our tips will make it easier for you.
For general tips on all heists in GTA Online, we have created an extensive, extra guide for you. Our detailed tips for the Doomday Heist will also help you to pass the multi-part heist in GTA Online with ease. If you are still new to the game, take a look at our guide to earning money in GTA Online more easily, as the heists represent the endgame of GTA Online and already require some practice and better equipment in the game.
Rockstar Games has announced "The Diamond Casino Heist" for December 12, 2019, where you'll embark on a heist into Los Santos' most secured building to date on behalf of the former casino owner. As soon as we've had a chance to look into it in detail, we'll of course provide a comprehensive guide to it as well!
2. The Prison Break (2)
- Preparation mission: Airplane
- Preparation mission: Bus
- Preparation Mission: Station
- Preparation Mission: Break(l)n off
- Final Mission: Prison Break
- Preparation Mission: Access Codes
- Preparation Mission: Insurgents
- Preparation mission: EMP
- Preparation mission: Valkyrie
- Preparation mission: Deliver EMP
- Final Mission: Humane Labs Raid
- Preparation Mission: Cocaine
- Preparation Mission: Garbage Truck
- Preparation Mission: Biker
- Preparation Mission: Grass
- Preparation Mission: Steal Meth
- Final mission: Series A financing
5. The Pacific Standard Heist/The Pacific Standard Job (5)
- Preparation mission: Vans
- Preparation Mission: Signal
- Preparation Mission: Hack
- Preparation Mission: Convoy
- Preparation Mission: Motorcycles
- Final Mission: Pacific Standard Heist
1. The Fleeca Heist/The Fleeca Job (1)
Cost for leader: 11.500 GTA$
Participants: two
Winnings: 57.500 GTA$ (easy), 115.000 GTA$ (normal), 143.750 GTA$ (hard)
Elite Challenge: Complete Heist in less than 5:20 minutes, car takes no more than 6% damage, no player dies
Unlocks: Karin Kuruma
This heist serves as an introduction to the mechanics of the Heists and only presents you with a few mild challenges. If you just want to make a little money with a teammate, you can do so comfortably with this simple bank robbery followed by a getaway.
Preparation Mission: Planning
Get in Lester's car and drive him to the Fleeca branch on the Great Ocean Highway to scout the area according to Lester's instructions. Afterwards, pick up your heist gear from Paige. The non-driver hacks into the bank's system via a mobile app (plays similar to "Snake"). After a successful hack, change vehicles and head to the garage.
Preparation Mission: Kuruma
You steal an armored Kuruma from a parking deck in Little Seoul and drive it to Lester's lair while enemies attack you. Thanks to the car's armor, however, you are relatively safe, and if in doubt, you can drive away from most enemies without much of a fight. Then return to the garage.
The hacker app works similarly to the classic game "Snake".
Final Mission: Fleeca Heist
For the finale, you'll divide up the upcoming tasks: As the driver, you steer the previously stolen armored Kuruma to the Fleeca branch. Once inside the bank, the driver destroys the security cameras and holds the hostages at gunpoint. The yellow intimidation bar shows how scared the hostages are. If the bar empties, one of the hostages tries to raise the alarm. To avoid this, alternately point your gun at the hostages or shoot at the wall next to them.
As the driller, you hack into the bank's security system via app again during the journey. After that, the drill opens a locker during the robbery and collects the loot from it. Be careful: The drill will overheat if you press too hard; cooling it down will cost you valuable time!
The Fleeca Bank robbery is carried out by two people.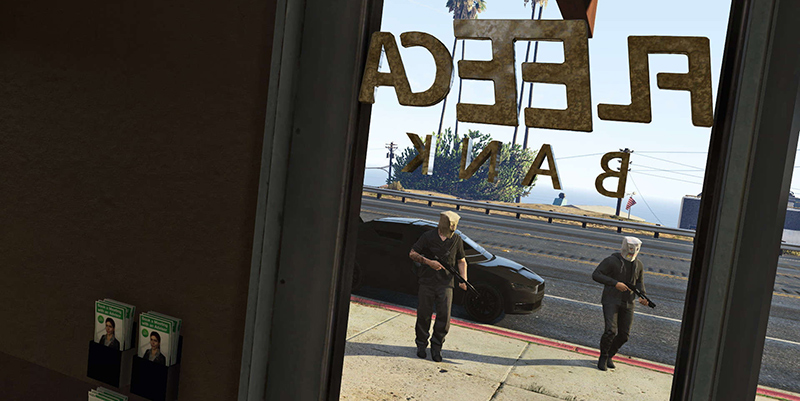
During the escape, steer the Kuruma to a yellow marker on the bridge, where a Cargobob helicopter with a magnetic hook is waiting. Match your speed to that of the Cargobob, then it will hoist you to safety at the magnet and the heist is successfully completed.
2. The Prison Break (2)
Leader cost: GTA$40,000
Participants: four
Win: GTA$200,000 (easy), GTA$400,000 (normal), GTA$500,000 (hard)
Elite challenge: reach extraction point in less than 4:40 minutes, Rashkovsky takes no more than 1% damage, no player dies
Unlocks: Lampadati Casco, Principe Lectro
Unlike the other heists with a robbery focus, here you'll prepare to get incarcerated criminal Rahskovsky out of Bolingbroke Penitentiary in Sandy Shores and then help him escape from Los Santos. This is where good pilots are needed, your best driver should also get some practice piloting a prison/school bus off-road.
Preparation Mission: Airplane
From a hangar at McKenzie Airfield, you'll steal the single-engine Velum business plane and fly it to Los Santos International Airport to use as an escape plane later.
With a Velum you finally fly your target to freedom - but you have to steal it first!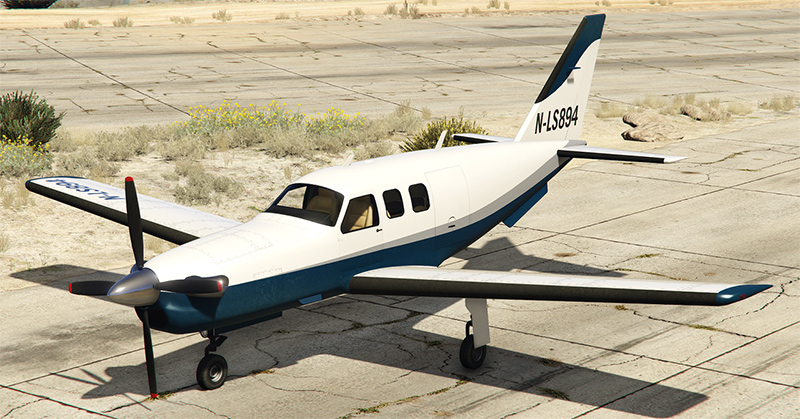
Important: Take cover as soon as you enter the hangar to give yourself an advantage in the fight against the attacking gangsters. After everyone is eliminated, only the designated pilot will fly the plane away, while the rest of the crew can watch via cam.
Preparation Mission: Bus
Four of you intercept the prisoner transport and steal the prison bus. First shoot down the police helicopter, then calmly get rid of your search level during a cross-country drive and bring the bus to the hiding place. Important: The driver should have experience driving buses, as they react much more sluggishly, especially when going off-road.
Preparation mission: Station
Team Sheriff: Two players call the police via emergency service in the cell phone and kill the arriving cops to hijack the car; afterwards, shake off pursuing cops. Pocket your weapons and enter the police station in disguise. Inside, keep right twice to reach the office with the marked timetable.
While disguised as police officers, look for the prison timetable.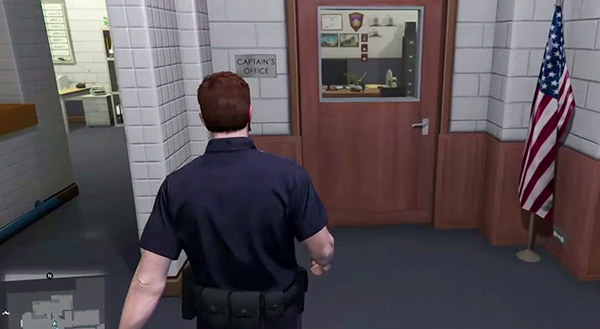
Steal them and quickly leave the station, then drive the police car to the marked place under the bridge. Spread the contents of the gasoline can on the hood of the car and ignite the gasoline with a shot. Wait until the police car blows up and then go to the marker to complete the mission.
Team Freighter: Two players drive to the marked freighter at the harbor. Put on your masks there and take cover behind your car to kill the first enemies. Shoot your way onto the ship and go to the containers at the left end of the ship. On the other side, the designated driver shatters the lock of the container. Then drive the car back to the hiding place. Be careful not to damage the car too much and save ball fights with your pursuers to avoid the attention of the police.
Preparatory mission: Absch(l)uss
Team Villa: To get rid of Rashkovsky's business partner Popov, two players drive to a vantage point overlooking his villa guarded by security guards. Take out the first two guards with silenced sniper rifles.
From the roof you will have an excellent view of the town hall.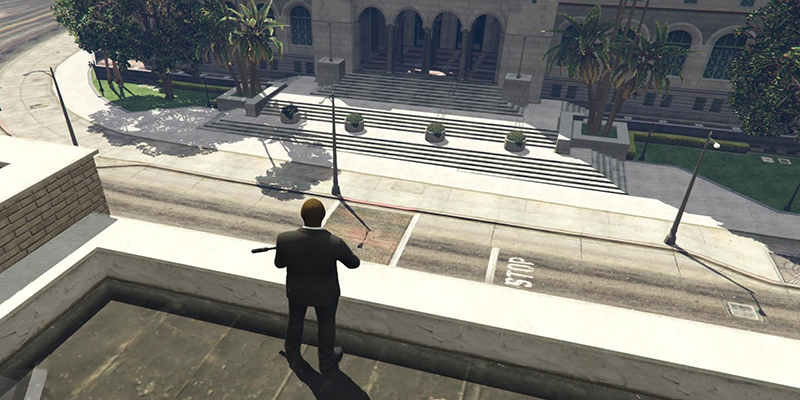
Then drive to the villa entrance, climb over the door and surround the villa on two sides. In general, use only silenced weapons for the guards so that Popov won't be alerted before you get to him. If you act too clumsily, he will escape and you will have to catch him on the run. After his death, leave the area.
Team Town Hall: Climb the ladders to the marked roof and lie in wait there with silenced sniper rifles until a black shafter arrives. Turn off the both exiting prosecutors at the same time, exit the roof and get into your car.
Only a prison bus will get you into Bolingbroke State Prison.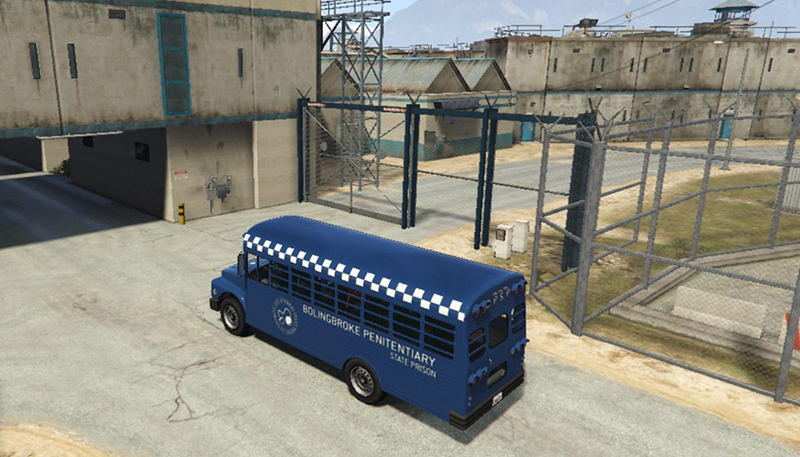
There are now plenty of trigger-happy police officers there. Drive the car directly to the sidewalk, the passenger gets out and collects both documents. After that, shake off the cops and return to the apartment.
Final Mission: Prison Break
Team Air consists of two players who perform tasks independently: The blaster first chases the regular prison bus heading to the prison and intercepts it, shooting the driver and eventually destroying the bus. He then drives to the west end of the Sandy Shores escape to steal a Buzzard fighter helicopter. Bomb the approaching fighter jet from the air and then assist the prison team in escaping once the NOOSE units arrive. After that, follow the pilot with the team and Rahskovsky on board to collect all team members from the beach at the end.
The pilot goes to Los Santos International Airport, gets on the waiting plane within the time limit and circles over Los Santos, even if the announced tasks are different. Wait for the demolitions expert to help the prison team escape, and after being told that you can land at Sandy Shores airfield, fly there and pick up the prison guard, the prisoner and Rahskovsky. Then get rid of the wanted level and fly to the meeting point in the air.
Disguised as a guard and prisoner, sneak into the prison.
Team Prison consists of two players acting together: One in the team takes the role of the prisoner, the other takes the role of the prison guard. Both of them drive to the police prison bus, where the guard gets in as the driver and the prisoner as a passenger. Attention: As a prisoner you only have access to one gun! However, the guard keeps all weapons, so he can drop better weapons as well as ammunition for the prisoner - this will make the upcoming shootout much easier for you.
Once inside the prison, first take out both guards near the bus simultaneously, then the one in the driveway, then the one near the ladder with a pump-action shotgun. Finally, deal with the last guard on the walkway above you and use the walkway to get to the first part of the prison yard to pick up Rashkovsky. It's best to take out the existing guards from the roof before the prisoner joins your target.
The prison guard will then take care of the incoming NOOSE units together with the blaster - coordinate with the other team here so that the prisoner doesn't trigger the scene with Rashkovsky too soon. If there is no other way, fight your way from cover to cover to the exit of the prison without air support. Always stay behind cover until Rashkovsky gets up by himself and moves to the next cover, only then the zone is safe. Then follow him quickly so that you don't get left behind outside the allowed mission zone.
During the escape, provide Rashkovsky with a weapon.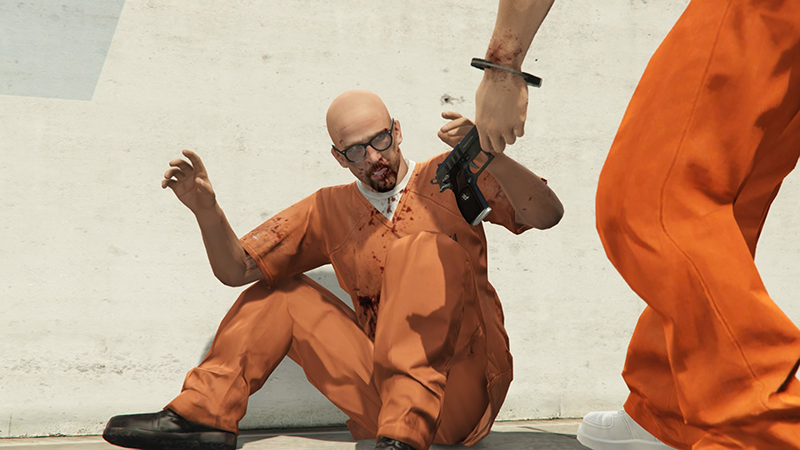
Grab the waiting squad car at the exit and replenish your armor with the protective vests inside it before heading towards the airfield and making off with the waiting plane. Then get rid of your mugshot level and fly to the drop point in the air. Your team will parachute down and be picked up on the beach by the blaster - done!
3. The Humane Labs Raid (3)
Leader cost: GTA$54,000
Participants: four
Win: GTA$270,000 (easy), GTA$540,000 (normal), GTA$675,000 (hard)
Elite Challenge: Complete Heist in less than 11:00 minutes, vehicle takes no more than 2% damage, no player dies
Unlocks: Mammoth Hydra fighter jet, Buckingham Valkyrie helicopter, HVY Insurgent, armed HVY Insurgent, Nagasaki dinghy boat, night vision mask, breathing mask
In this heist, Agent 14 entrusts you with the delicate task of breaking into Humane Labs and stealing their valuable data. Since Humane Labs is guarded by the private security company Merryweather, you'll need quite a bit of equipment in addition to four players to succeed. Parts of the final heist are similar to the single player mission "Affige Angelegenheit/Monkey Business".
Preparation Mission: Access Codes
Drive to the rendezvous point, a parking lot on Elgin Avenue, where two players from your group are waiting in the parking lot for your contact. The other two players take up a backup position off to the side.
The "Humane Labs" is your destination point at the end of the raid.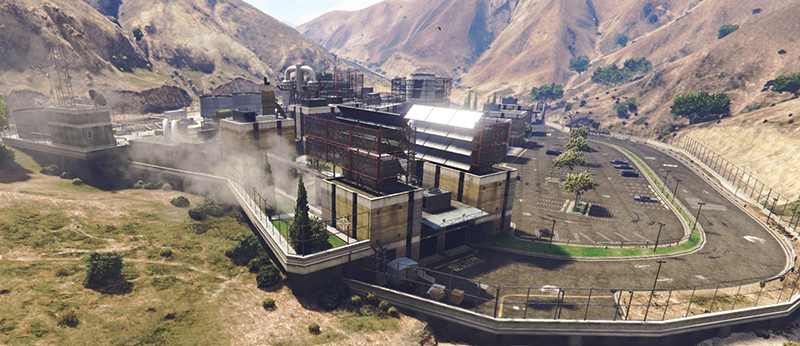
No sooner has the contact confirmed the information in the form of a briefcase he brought with him than FIB agents attack from the direction of the two side alleys leading to the parking lot. The players outside take care of taking out the agents, while the players in the parking lot take cover and support them. Grab the suitcase, take out the next wave of enemies and leave the parking lot.
Preparation Mission: Insurgents
Head to the Davis Quartz Quarry and take out all the Merryweather guards from a safe distance with sniper rifles. Once all the enemies are dead, grab the two Insurgents parked in the quarry and take them to the objective point north of Alamo Lake. Drive in formation and use the Insurgents' on-board weapons to take out your pursuers, especially the Merryweather helicopters. After that, take the Insurgents to the end point.
Preparation Mission: EMP
Head to the end point on the coast to take the dinghy waiting there to the aircraft carrier. This is located near the map border, the trip will take a few minutes. Drive to the back of the ship and use the stairs and the door there to gain access to the ship.
When the access code is handed over, you will have to deal with the FIB.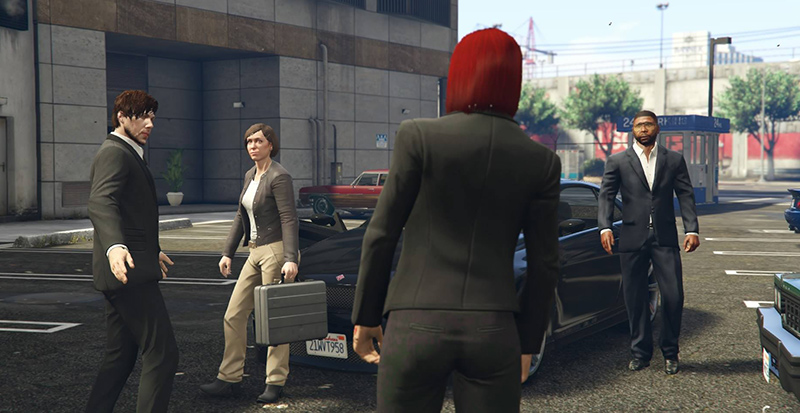
Shoot your way to the airfield; here many enemies are waiting, so advance together slowly and from cover to cover. On the upper deck, your target plane and several laser jets are waiting with the Hydra (with EMP installed on board). One player takes over the Hydra while the others escort the Hydra in the jets and shoot attacking enemies out of the air. Once the Hydra is delivered to the Sandy Shores airfield hangar, you have completed the mission.
Preparation Mission: Valkyrie
Head to the Los Santos Naval Port, as the required Valkyrie gunship is located there. Since the entrance and the area are guarded by Merryweather people, you will travel in the armored Kuruma and wear your Heist vests to survive the way to the helicopter despite heavy enemy fire. Be careful, there are snipers among the Merryweather people!
Alternatively, three players attack the area from the front while the fourth player swims around the area to get to the helicopter. Once you've grabbed the Valkyrie, it will be attacked by two Froggers and a Buzzard, which you'll take out with the copilot's on-board weapons and the miniguns on either side. Once the three helicopters are shot down, more will spawn, which you will also shoot down before flying to the objective.
Preparation Mission: Deliver EMP
Drive to the Insurgent's location and get into the vehicle now equipped with the EMP. Drive it carefully and without causing any damage to the entrance of Humane Labs. There are guards there, which you can avoid as one of the players gets access to the security cameras.
The HVY Insurgent is a useful vehicle not only at Humane Labs-Heist.
Use only silenced weapons and take out the guards at the gate, then the driver of the vehicle leaving the building. Work your way proceedslowly and carefully, as the mission will fail as soon as a guard spots you or a corpse.
Once you reach the garage, a player will hack into the door lock and open the entrance, then park the Insurgent at the designated spot. Grab the Humane Labs-logoed Boxville near the garage and slowly drive past the incoming Merryweather convoy to leave the area without a fight.
Final Mission: Humane Labs Raid
Team Boden consists of two players acting together: Wait for the pilot to reach the target point above the Humane Labs and jump out of the Valkyrie, using your parachutes to make your way to the ground. There, use your night vision to make your way to the building. Blow up the front door and kill all the guards in your way as you make your way towards the labs. Stay close together to increase your chances of survival. In the lab, use the two keycards at the same time to open the door.
The ground team moves through the Humane Labs building with night vision.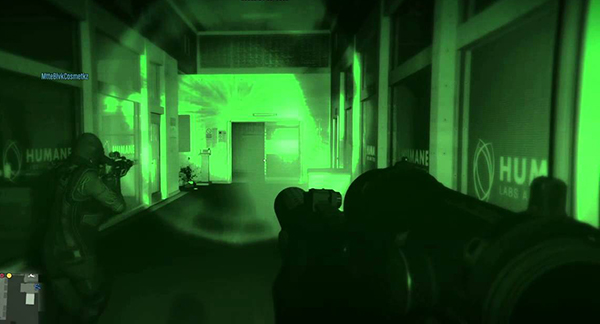
After stealing the data from the computer, go to the elevator and fight your way to the underwater tunnel. Dive there and use your night vision devices for orientation. Don't use the breathing apparatus until your oxygen gauge is low. Once on the beach, fire a flare gun signal for your pilot to pick you up. Once you're on board, assist the gunner with the miniguns to shoot down the Buzzards chasing you.
Team Air consists of two players with different tasks. The pilot should have practice piloting helicopters and will fly the Valkyrie to the target point above Humane Labs. Watch for the EMP to fire and only then go lower so your gunner can see enemies both in the air and on the ground. Several gunships will attack you. Keep the Valkyrie as still as possible so that the gunner can fire as undisturbed as possible. After detecting the ground team's flare, fly to the beach and collect the remaining team members.
Use the Valkyrie to protect your ground team from enemy attackers.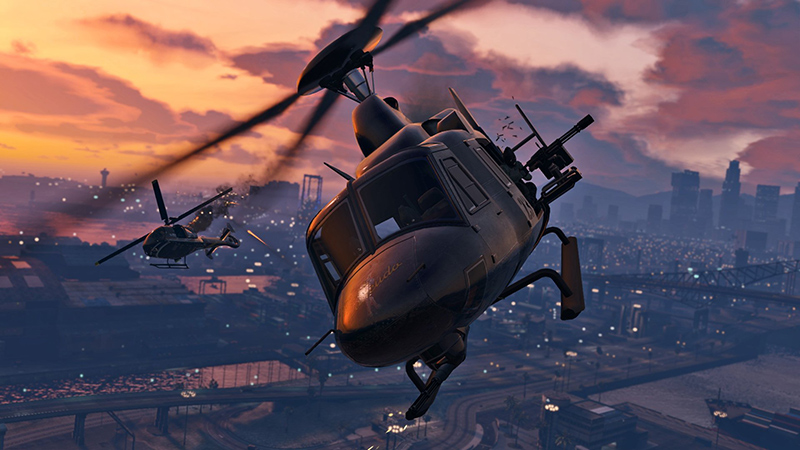
After collecting the ground team, you will have to get rid of several attacking helicopters again and finally fly to the target point. After that, destroy the Valkyrie and the heist is over.
4. Series A Funding (4)
Leader cost: GTA$40,400
Participants: four
Win: GTA$202,000 (easy), GTA$404,000 (normal), GTA$505,000 (hard)
Elite Challenge: Complete Heist in less than 6:30 minutes, kill 75 enemies, no player dies
Unlocks: Karin Technical
This one is all about drugs and selling them, as you help Trevor open up new markets with some pretty thuggish means. First, you'll steal the goods from the various Los Santos gangs in preparation for the heist, and then you'll distribute them to the people in the final coup.
Preparation Mission: Cocaine
Split into two teams of two. Team Boot grabs a motorboat in Vespucci and approaches the target yacht by sea, Team Luft picks up a Frogger at Higgins Helitours and reaches the yacht by air. Coordinate so that both teams reach the yacht at the same time.
Why make it yourself when you can steal it from enemies?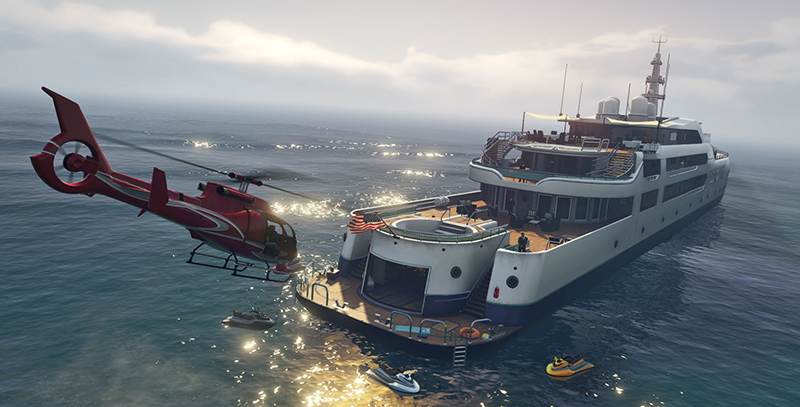
While Team Air takes out the visible enemies, the Team Boat people split up and slowly advance inside the yacht. Pick up all eight scattered cocaine packs and be careful not to rush forward too quickly. All enemies are well armed, especially narrow corridors can become a problem.
Team Luft is on the lookout for reinforcements approaching by helicopter, which Team Boot has to take out with rocket launchers. Leave the yacht in the Frogger as soon as you have all eight packages, alternatively use the jet skis. Get rid of your wanted level and bring the cocaine to the warehouse.
Preparation Mission: Garbage Truck
Drive to the recycling center on Alta Street and take out all the guards to steal the garbage truck waiting there. Now drive to the different destinations to collect the garbage bags prepared with drugs. After the second trash bag, the Vagos will attack. Two team members will take them out as soon as possible, while the garbage truck driver and the passenger will take care of the garbage bags. Do the same at the third and fourth target points, then deliver the stolen bags to the warehouse.
Preparation Mission: Biker
Pick up weapons with silencers. If you don't have any, you'll get some from Trevor, which he left in the garage of his trailer. Take the dinghy provided west of Sandy Shores to Stab City.
For the "Series A Funding" heist, you'll even become garbage drivers.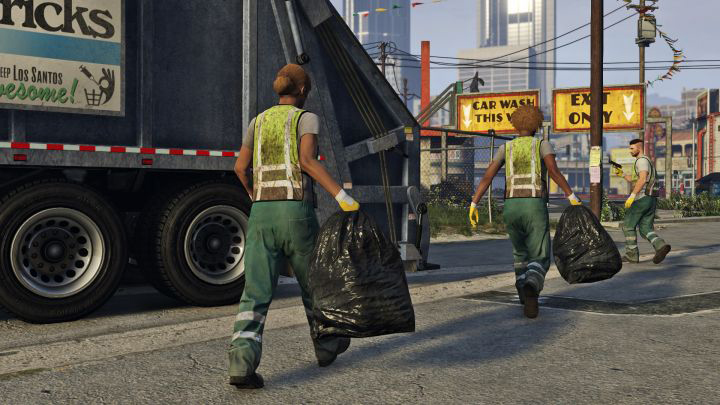
There you will take out all the members of the Lost MC as quietly as possible. If you get caught by a biker, the mission is considered a failure. After killing all the bikers, grab the two vans and take them to the warehouse. Ignore the bikers attacking you on the way, concentrate on delivering the vans as undamaged as possible.
Preparation Mission: Grass
For this preparation mission, you will also proceed in two teams of two. First, head to the Paleto Forest sawmill. Team Schutz takes up position outside the compound and protects Team Boden as it advances into the Ballas-occupied area. Advance slowly as a Team Boden member, staying in cover and allowing Team Schutz to eliminate your enemies. Team Boden grabs the two parked Benson vans in the middle of the area, Team Schutz grabs the parked Karin Technical.
In the sawmill, grab two delivery trucks with grass 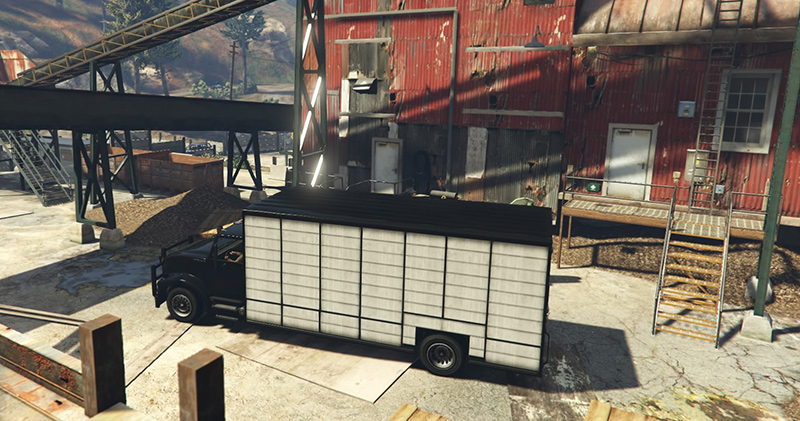
Since the Bensons move slowly and you'll be attacked by Ballas reinforcements on the way to the warehouse, you'll have to take them out with the Technical's on-board weaponry. Pay attention to the time limit here, you only have seven minutes!
Preparation Mission: Steal Meth
In this mission, the O'Neill Ranch is a drug-producing stronghold, which you'll first infiltrate and take out all the meth dealers outside. Split up to move faster here. In the farm building itself, you should advance slowly and carefully, as the narrow corridors can be very dangerous for lone fighters. As soon as you have killed most of your opponents, grab one of the three tankers with liquid meth to bring it to Trevor's meth lab. Take out any pursuers as quickly as possible, as filling the tanker is a huge risk. If your opponents shoot at it too often, it may explode!
Final mission: Series A funding
Since all four gangs have by now realized who has been playing them dirty, they will launch a retaliatory attack on Trevor's warehouse, which you will have to defend. Split into two teams of two. One team defends the warehouse on the south side of the building, the other on the north side. For more firepower against the many incoming enemies, you can also use the waiting Karin Technical.
In the Heist finale you have to deliver the goods as undamaged as possible.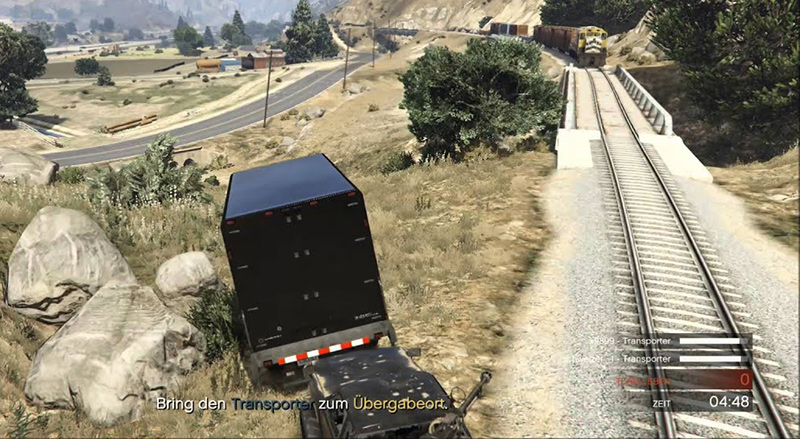
Trevor will then send you out with the drug-loaded vans to deliver the drugs to their buyers. Two players in the team act as van drivers here, while the other two defend them with the Technical. Drive in tight convoy and prioritize getting the helicopters out of the sky before taking care of the bikers and vehicles. The drivers will focus on getting the vans to their destination, a lighthouse in Blaine County, as undamaged as possible. Once you've delivered the vans, the heist is complete for you - if you're completing this for the first time, be sure to watch the following cutscenes!
5. The Pacific Standard Robbery/The Pacific Standard Job (5)
Leader cost: GTA$100,000
Participants: four
Win: GTA$500,000 (easy), GTA$1,000,000 (normal), GTA$1,250,000 (hard)
Elite Challenge: Complete Heist in less than 10:15 minutes, NOOSE is not alerted, no player dies
Unlocks: Savage, Principe Lectro, Gang Burrito Van
With this challenging heist you reach the top class of all criminals in Los Santos, because you rob a well secured bank in the classic way and only with a well working team you get away with the stolen money. Be sure to use all previous heists to practice as a team, you should not try this heist with random players, because even small mistakes mean failure!
Preparation Mission: Vans
Form two teams, each consisting of a driver and a navigator. Your task is to find four Boxville Post delivery vans driving in Los Santos within nine minutes using the Trackify app.
The really big vault is waiting in the Pacific Standard Bank.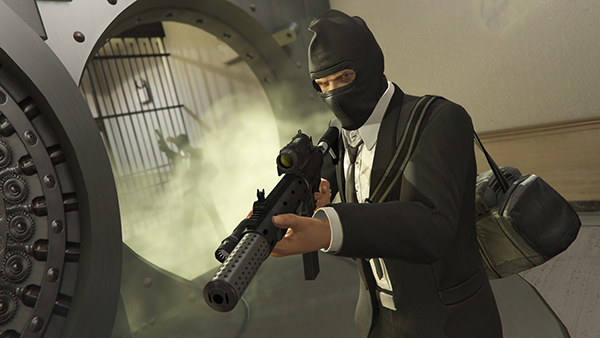
So it's best to talk to each other via a voice chat program like Teamspeak or Discord while you're at it to save time. Only the navigator in question can use Trackify and take a picture of the van's license plate. Therefore, the driver needs the navigator's directional information. Once you have photographed all four vans, Lester will tell you your target vehicle. Steal it and bring it to the destination.
Preparation Mission: Signal
You'll take jet skis to the island north of Chumash to deliver the transponder stolen in the previous mission. Once there, you'll defend your target against a large number of agents and policemen. After that, you'll escort the target to a motorboat and take him to a small farm near Grapeseed, while the police will still be following you. Get rid of your wanted level before heading to the destination point.
Preparation Mission: Hack
In order to "borrow" the hacking equipment of another bank robbery group, drive to Vinewood Boulevard in the van provided. There you will face the other criminals in a side alley and eliminate them, grab their stuff and reload it into your van. To do this, park your van near that of your rivals so that the corresponding cutscene starts.
While robbing a Merryweather convoy, you'll capture some equipment.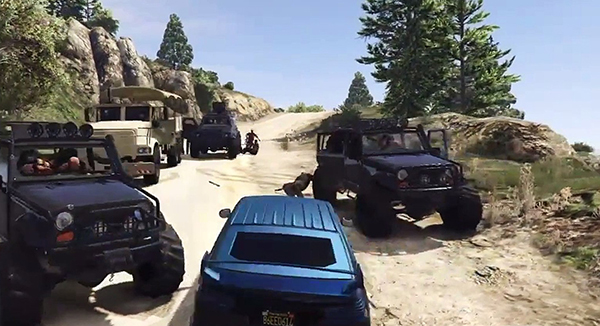
After that, your driver will drive the equipment to Lester's warehouse, while the three other team members in your rivals' van will lure away their supporters. As soon as the equipment arrives at the warehouse, you'll destroy the rivals' van to complete the mission.
Preparation Mission: Convoy
Lay in wait at the rendezvous point near the Calafia Bridge, as you are to ambush a Merryweather convoy. This consists of vehicles traveling in the following order: Mesa, Barracks, Insurgent and Savage. Ideally, a good marksman from your team will use a heavy sniper rifle at some distance to support the others on the ground; the most important target here is the Insurgent's gunner.
First take out the escorting helicopters with missiles from the sky before turning your attention to the vehicles. Be careful not to destroy the barracks, as it contains the thermal charge you're here for in the first place!
You steal your motorcycles for the heist from the Lost Motorcycle Club.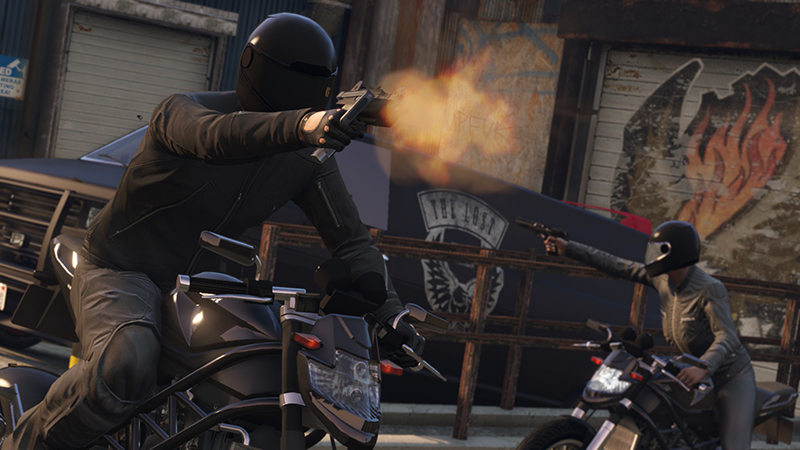
Two players man the Insurgent and provide fire support against your Merryweather pursuers with its on-board armament on the way to Lester's hideout in Grapeseed. It's best to let the Insurgent go ahead to protect the barracks; the mercenaries will retreat once you reach Grapeseed.
Preparation Mission: Motorcycles
Attack the Lost MC clubhouse in East Winevood in the armored Kuruma and kill all the bikers. Then grab the four Lectro motorcycles and drive them to the back alley of Downtown Vinewood. On the way there you will be continuously attacked by Lost, best just drive away from them.
Final Mission: Pacific Standard Heist
Good drivers are needed for the finale of the heist, as you'll be riding the previously stolen motorcycles for a good portion of the mission. Split your team as follows: one hacker, one demolitions expert and two hostage takers. First, drive to the bank together, taking care not to build up a wanted level on the way. Then you enter the bank together and act according to your roles.
In the banking hall of the Pacific Standard Bank, the hostage-taking team is busy.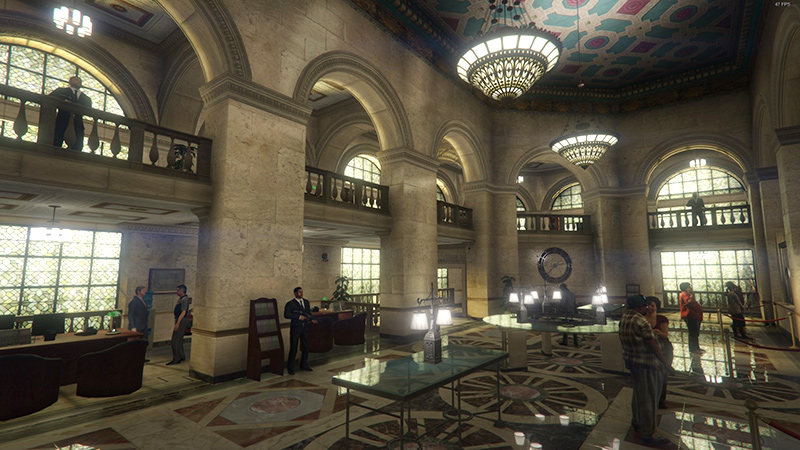
The hacker, together with the hostage takers, starts threatening the people present. The blaster distributes explosives at the security doors and waits until both doors are open. Only when the blaster has cleared the way through the first and second security gates, security guards spawn and are taken care of by the blaster and the hacker together. After that, the hacker uses the panel next to the safe door and hacks into the security system with a brute force attack in the mini-game.
Once the safe door is open, the hacker collects the money lying in the safe together with the blaster. Be careful: as soon as one of the two money carriers is shot by enemies in the future, he loses money. It is therefore recommended that only the weaker shooter of the two takes the money, so that this one player can be protected by all three others on the coming escape and you make as little loss as possible.
Meanwhile, the hostage takers threaten the civilians present by shooting at the walls or pointing your weapons at the hostages. The bigger and more dangerous your weapons, the greater the intimidation effect. If you don't manage to intimidate the hostages or if you kill one or more hostages, you will also have to deal with NOOSE units in the future, which will make your escape much more difficult!
Barely out of the bank, a proper shootout awaits you.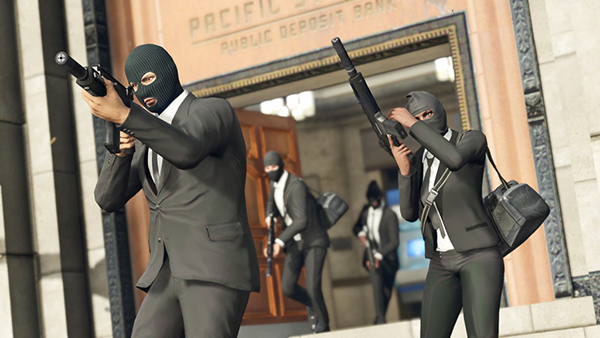
Once you have the money, meet in front of the bank exit. Leave the bank and use weapons like the minigun to cause as much damage as possible to the waiting policemen as quickly as possible. Protect the money carrier(s) to keep your losses low! Once you've taken out several police teams, you'll be instructed to escape on the Lectro motorcycles set up in a side alley.
However, there is also an armored police bus along this alley, which you can easily use to break through barriers and is therefore a more suitable escape vehicle than the motorcycles. On the run, you'll have to continuously dodge barriers and police, falling off your motorcycle is usually fatal. Use the KERS function of your Lectros when escaping on the motorcycles and approaching the barriers.
Thanks to KERS function of Lectro motorcycles you can break through barriers.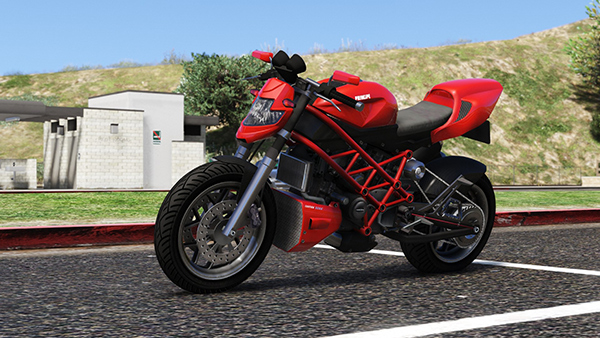
Once you reach your target area, the canyon, head towards the cliffs and parachute off the bike towards the dinghy on which you escape across the river. Once you reach the bridge, the heist is over.
More interesting articles about GTA Online:
- GTA Online: Diamond Casino Guide - 10 Tips & Tricks
- GTA Online action figures: Find all 100 comic figures easily
- GTA Online Treasure Hunt: Find Double-Action Revolver
Visit us on Facebook and Instagram and discuss your favorite games with us.