Horizon Zero Dawn machines: How to defeat them all
In this machine guide to Horizon Zero Dawn you will learn:
- How to defeat all the machines
- What the machines' weaknesses are
- What kind of loot the machines drop
In addition to our Horizon Zero Dawn survival guide, we also offer a comprehensive overview of the machine enemies. If you want to read about the easiest way to defeat the new machines in "The Frozen Wilds" DLC, click through to another article.
- Longneck
- Guardian
- Red-eyed guardian
- Runner
- Graser
- Scavenger
- Broadhead
- Lance horn
- Long leg
- Trampler
- Sawtooth
- Armored walker
- Fire Roar Ridge
- Ice Roarback
- Striker
- Gray Goshawk
- Devastator
- Snapmouth
- Behemoth
- Stalker
- Corrupter
- Petrel
- Stonebreaker
- Thunder Jaw
- Deathbringer
Before we get into each individual machine and provide you with more than just information on weaknesses, the best strategy for victory , and more, here are some general tips:
- Never underestimate an opponent. Even if you are at a higher level, machines that are supposedly harmless can get you if you are careless and they call for reinforcements or catch you on the wrong foot.
- TheAI of the enemies is unpredictable, which can be especially dicey with enemy types like runners or grazers. If they take flight during one confrontation, they can just as easily attack you the next time.
- Corrupted machines are generally vulnerable to fire and are surrounded by a black and red aura. They are significantly stronger and more aggressive than their normal counterparts.
Longneck
The only machine you won't have to fight in Horizon Zero Dawn. These gentle giants trot around in different zones of the game world and must be climbed as well as bridged to unlock a large part of the map at once. Find an elevated position and jump on the climbing griffons to get on the radar.
Aim for the eyes on the guards to take them out quickly.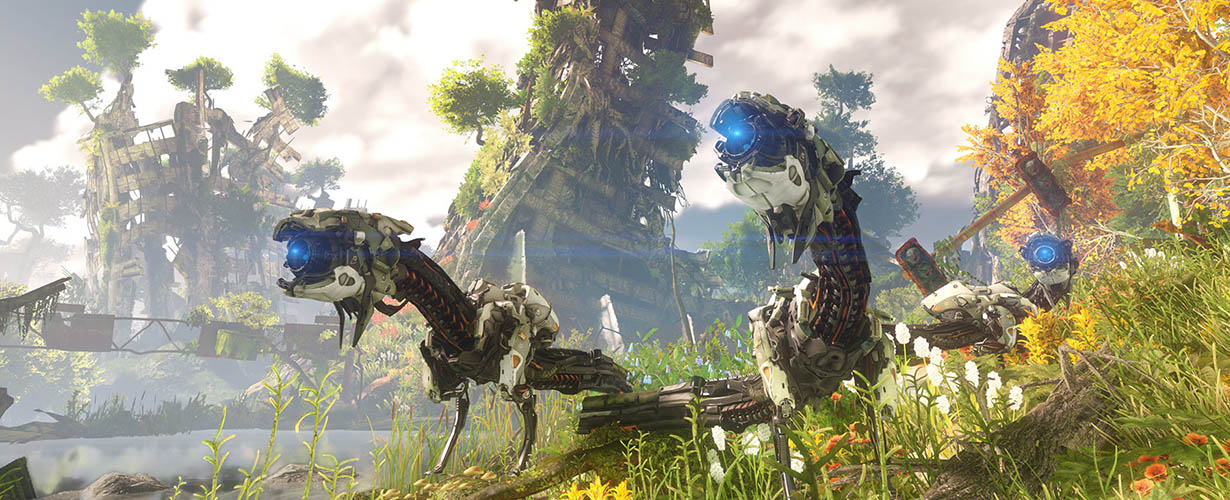
Guardians
- Weakness: Eye (weak against any attacks)
- Behavior: patrols on fixed routes that you can read with Focus; often comes to the aid of other machines when attacking them
- Strategy: target his eye for maximum damage or perform a stealth kill with Silent Strike to take out a guard quickly
- Override: seek out Hatchery PSI and override the core there; cannot be used as a riding machine
- Loot: metal shards, detonator, wire, small machine core (rare), guardian lens (uncommon), guardian heart (rare)
Red Eye Guardian
- Weakness: eye (weak against any attacks)
- Behavior: patrols fixed routes that you can read with Focus; often comes to the aid of other machines when attacking them; attacks with dangerous laser blasts, likes to act in a swarm; more resilient than normal guardian
- Strategy: target his eye for maximum damage or perform a stealth kill with Silent Strike to take out a guardian quickly
- Override: seeks out Hatchery PSI and overrides the core there; cannot be used as a riding machine
- Loot: metal shards, fuse, wire, small machine core (rare), guardian lens (uncommon), guardian heart (rare)
Runner
- Weakness: tan container (fire & demolition)
- Behavior: herd animal that tends to flee, but can also kick violently and show aggressive behavior when threatened
- Strategy: Fire arrow shots at the Lohebehälter result in devastating explosions; Demolition arrows remove raw materials from the Lohebehälter without destroying the machine; Stealth kill with Silent Strike takes out runners immediately
- Override: seeks out hatchery PSI and overrides core there; can be used as riding machine
- Loot: metal shards, detonator, wire tan, small machine core (rare), runner lens (uncommon), runner heart (rare)
Never underestimate the deadly antlers of a Graser.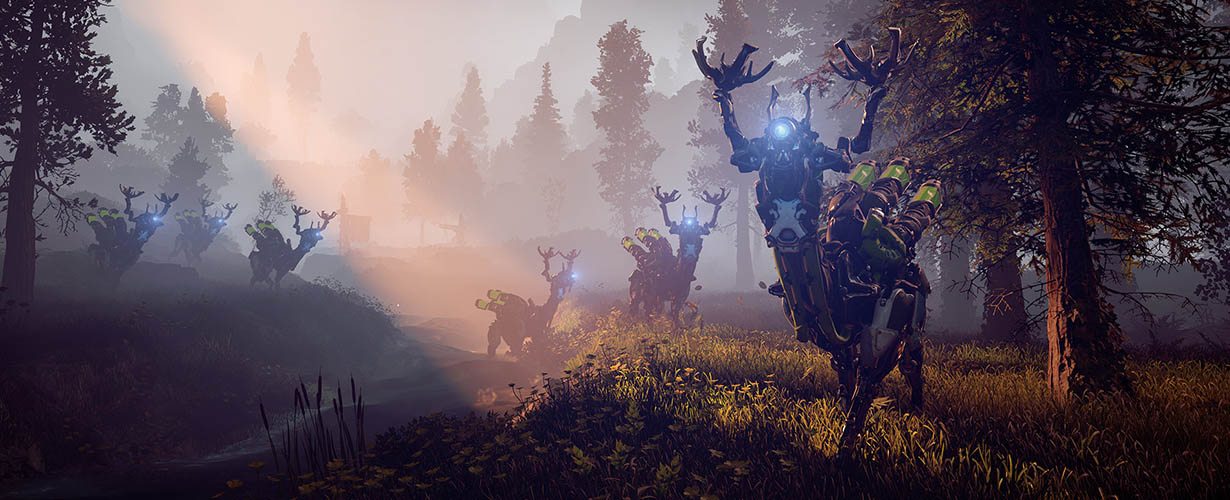
Graser
- Weakness: tan tank (fire & demolition), rotor blades (demolition)
- Behavior: Herd animal that can make attacks with antlers before fleeing
- Strategy: fire arrow shots on the lohe tank result in devastating explosions; demolition arrows remove raw materials on the lohe tank without destroying machine; best destroys rotor blades with demolition arrows to disable these attacks; stealth kill with silent strike immediately disables Graser
- Override: seek out hatchery SIGMA and override core there; cannot be used as riding machine
- Loot: metal shards, detonator, wire tan, small machine core (rare), Graser lens (uncommon), Graser heart (rare)
Scavenger
- Weakness: energy cell (shock & demolition), radar (demolition)
- Behavior: like an aggressive predator; roams around alone as well as with conspecifics; be prepared for melee attacks (Maul) and long distance attacks (Laser)
- Strategy: Shock or Demolition arrows to the power cell will cause devastating explosions; aim Demolition arrows at the radar on top of your back to prevent marauders from tracking you; Stealth Kill with Silent Strike will take out marauders instantly
- Override: visit SIGMA Hatchery and override the core there; cannot be used as a riding machine
- Loot: metal shards, detonator, wire, metal vessel, small machine core (rare), looter lens (uncommon), looter heart (rare)
Broadhead
- Weakness: tan container (fire & demolition); horns (demolition)
- Behavior: found in herds; no flight reflex; strong melee attacks
- Strategy: fire arrow shots at lohe tank result in devastating explosions; take horns under fire with demolition arrows to separate them from broadhead; stealth kill with silent strike immediately takes out broadhead
- Override: seek out Hatchery PSI and override the core there; can be used as a riding machine
- Loot: metal shards, fuse, wire, metal vessel, tan, small machine core (rare), broadhead lens (uncommon), broadhead heart (rare)
Lance Horn
- Weakness: drill horns (demolition), ice containers (ice & demolition)
- Behavior: agile herd animal with penetrating melee attacks
- Strategy: ice arrows explode ice containers, demolition arrows remove them from lance horns; drill horns can also be separated from the machine with demolition arrows, thus the corresponding attack is no longer possible
- Bridging: seeks out SIGMA hatchery and bypasses core there; cannot be used as a riding machine; stealth kill with Silent Strike immediately disables Lance Horn
- Loot: metal shards, fuse, wire, metal vessel, cooling juice, small machine core (rare), lance horn lens (uncommon), lance horn heart (rare)
Longleg
- Weakness: energy cell (shock & demolition), concussion pouch (weak to any attacks), antenna (demolition), wings (weak to any attacks), body is generally sensitive to shock attacks
- Behavior: agile and able to perform large jumps; emits warning calls that attract other machines
- Strategy: shock arrows, wires, bombs, or traps are very effective; attacks on concussion pouch and energy cell produce strong shock waves, explosions, respectively; removes antenna with wrecking arrows to prevent warning calls to other machines; attacks on wings of longleg override storm attack; always keeps moving due to agility
- Bridging: seeks out hatchery RHO and bridges core there; cannot be used as a riding machine
- Loot: metal shards, fuse, wire, echo sleeve, medium machine core (rare), long leg lens (uncommon), long leg heart (rare), glowing braid (rare)
Trampler
- Weakness: energy cell (shock & demolition), processor unit (weak against any attacks), excavation horns (demolition), body is generally sensitive to ice but resistant to fire
- Behavior: to be met with other conspecifics; draws its circles around you in battle; attacks with fire and explosions
- Strategy: ice arrows, wires, bombs, or traps are very effective; demolition arrows tear off excavation earpieces and disable the attack made with them; aimed shots at energy cell and processor unit cause explosions; destroy processor unit to disable trampler's fire attacks; keep an extra close eye on him in combat as he circles you
- Override: seek out Hatchery RHO and override the core there; cannot be used as a riding machine
- Loot: metal shards, fuse, wire, metal vessel, medium machine core (rare), trampler lens (uncommon), trampler heart (rare), glowing mesh (rare)
Sawtooth
- Weakness: tan container (fire & demolition); body is generally sensitive to fire
- Behavior: can be found alone or with other sawtooths; strong melee attacks; aggressive and agile, gets very close to you very fast with a few sets
- Strategy: fire arrows, wires, bombs or traps are very effective; fire arrow shots at the tan tank result in devastating explosions; keep a close eye on the machine to avoid unpleasant surprises
- Bridging: visit SIGMA hatchery and bridge the core there; cannot be used as a riding machine
- Loot: metal shards, fuse, wire, tan, medium machine core (rare), sawtooth lens (uncommon), sawtooth heart (rare), glowing mesh (rare)
Attack the crate holders to get the loot.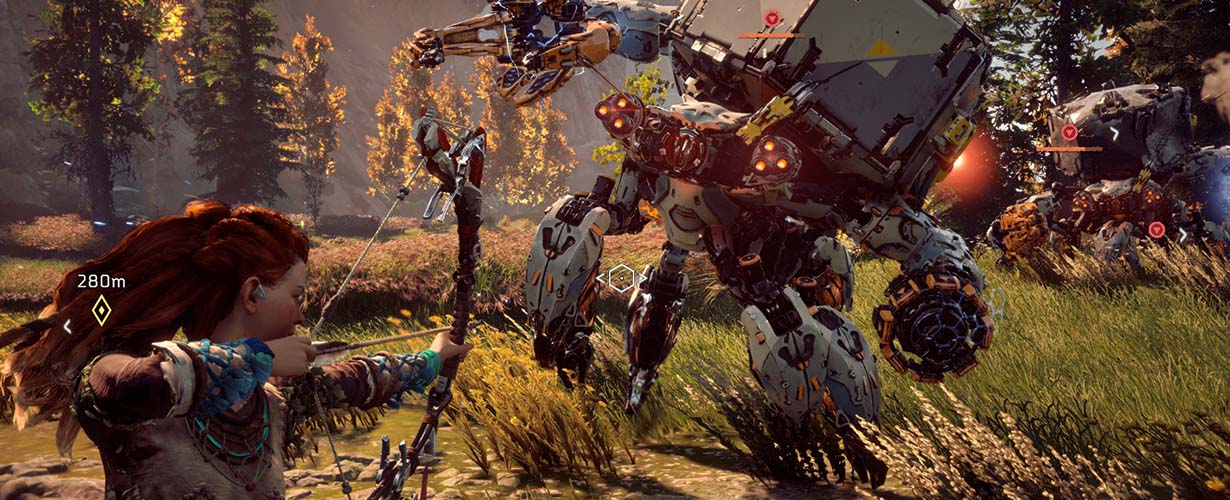
Armored Walker
- Weakness: lightning gun (demolition), crate holder (weak against any attacks), shield claw (demolition), power generator (weak against any attacks)
- Behavior: mostly found with conspecifics, but is also escorted by guards; defends the cargo on his back with all means; activates his shield in case of danger
- Strategy: either attack Shield Claw and Lightning Rifle with Tear-Off Arrows and separate them from the Armored Walker before he can even use them; if you are only after the loot, attack the Crate Holder on the back of the machine
- Override: seek out hatchery RHO and override the core there; cannot be used as a riding machine
- Loot: Metal shards, detonator, wire, metal vessel, medium machine core (rare), armored walker lens (uncommon), armored walker heart (rare), glowing mesh (rare)
Fire Roar Ridge
- Weakness: cargo pouch & maw (weak against any attacks), lohe container (fire & demolition), body is generally sensitive to ice but resistant to fire
- Behavior: fire-breathing, aggressive machine; occurs in conjunction with ice roarback
- Strategy: ice arrows, wires, bombs or traps are very effective and make machine brittle and thus more vulnerable; targeted fire arrow shots at tan tank cause large explosions; destroys maw and cargo bag to make fire attacks impossible and cause explosions
- Override: seeks out Hatchery XI and overrides the core there; cannot be used as a riding machine
- Loot: metal shards, tan, medium machine core (rare), roar ridge lens (uncommon), roar ridge heart (rare), glowing mesh (rare)
Ice Roarback
- Weakness: cargo bag & maw (weak against any attacks), ice container (ice & demolition), body is generally sensitive to fire but resistant to ice
- Behavior: aggressive machine that attacks with ice attacks; occurs in conjunction with fire roar backs
- Strategy: fire arrows, wires, bombs or traps are very effective; targeted ice arrow shots at ice container cause large explosions; destruction of maw and cargo bag disable corresponding attacks and cause explosions
- Bridging: seeks out Hatchery XI and bridges the core there; cannot be used as a riding machine
- Loot: metal shards,cooling juice, medium machine core (rare), howler back lens (uncommon), howler back heart (rare), glowing mesh (rare)
Striker
- Weakness: tan container (fire & demolition), horns (demolition)
- Behavior: Herd machine, which not only attacks together, but also pursues you
- Strategy: shoot demolition arrows at the horns to detach them from the striker and make his assault impossible; use fire arrows to make the lohe tank explode and damage other machines in the herd as well
- Override: seeks out hatchery PSI and overrides the core there; can be used as a riding machine
- Loot: metal shards, detonator, wire, metal vessel, lohe, small machine core (rare), striker lens (uncommon), striker heart (rare)
Gray Goshawk
- Weakness: beak (demolition), ice pack (weak against any attacks); body is generally sensitive to fire, but resistant to ice
- Behavior: flying machine that appears in groups; strong in ranged combat due to elemental attacks with ice, but can also perform melee attacks from flight; similar to a scavenger, often found near disabled machines
- Strategy: fire arrows, wires, bombs or traps are very effective; watch as much as possible for the small icons that indicate the position of your enemies when the gray goshawk flies out of your field of view; shoot wrecking arrows to sever the beak and attack the ice bag to disable the elemental attack as well as cause an explosion; these inflict damage to gray goshawks especially effectively in groups
- Override: seeks out Hatchery XI and overrides the core there; cannot be used as a riding machine
- Loot: metal shards, detonator, wire, cooling juice, small machine core (rare), grayhawk lens (uncommon), grayhawk heart (rare)
Devastator
- Weakness: devastator cannon (demolition), energy cell (shock & demolition), ice container (ice & demolition), body is generally sensitive to fire but resistant to shock
- Behavior: aggressive and agile machine that attacks from a distance with devastation cannon but also comes up with powerful melee attacks
- Strategy: disconnect the Devastator Cannon with a Demolition Arrow and use it to fire at the machine; fire arrows, wires, bombs, or traps are generally very effective; attack the Energy Cell and Ice Tank with their respective elemental or demolition attacks to trigger explosions and get more loot
- Override: seek out Hatchery RHO and override the core there; cannot be used as a riding machine
- Loot: metal shards, detonator, wire, cooling juice, medium machine core (rare), devastator lens (uncommon), devastator heart (rare), glowing mesh (rare)
Horizon Zero Dawn Machines: Snap Mouth
- Weakness: tan container (fire & demolition), ice bag (weak against any attacks), body is generally sensitive to fire but resistant to ice
- Behavior: large but at the same time agile machine that occurs both alone and with conspecifics; attacks on land and in water; ice ranged attack and hard blows in close combat
- Strategy: fire arrows, wires, bombs or traps are very effective; destruction of ice bag and tan container cause explosions; if you destroy the ice bag, the snapping mouth can no longer use its ranged attack
- Bridging: seek out hatchery RHO and bridge the core there; cannot be used as a riding machine
- Loot: metal shards, fuse, wire, cooling juice, tan, medium machine core (rare), snap mouth lens (uncommon), snap mouth heart (rare), glowing mesh (rare)
Behemoth
- Weaknesses: Energy cell (shock & demolition), box holder (weak against any attacks), power loader (demolition), ice container (ice & demolition)
- Behavior: compact and aggressive machine; overruns you or loosens stones from the ground, which it hurls at you from a distance
- Strategy: fire the power cell and ice bin to cause explosions; disable the ranged attack by targeting the power loader with demolition arrows to dislodge it from the Behemoth
- Override: seek out Hatchery XI and override the core there; cannot be used as a riding machine
- Loot: metal shards, fuse, cooling juice, echo sleeve, large machine core (rare), behemoth lens (uncommon), behemoth heart (rare), crystal mesh (rare)
Stalker
- Weakness: demolition is the common weakness of the components camouflage generator, mine launcher, and dart gun; body is generally sensitive to shock
- Behavior: agile, fast enemy type with stealth and a penetrating ranged attack; can place explosive mines
- Strategy: shock arrows, wires, bombs, or traps are very effective; keep an eye on the stalker as much as possible and act quickly when its stealth briefly wears off; fire wrecking arrows at cloaking generator, mine launcher, and dart gun to disable the stalker's respective abilities; watch out for booby traps
- Override: visit Hatchery XI and override the core there; cannot be used as a riding machine
- Loot: metal shards, detonator, wire, metal vessel, echo shell, medium machine core (rare), pirate lens (uncommon), pirate heart (rare), glowing mesh (rare)
Beware of the Corrupter's jump attacks.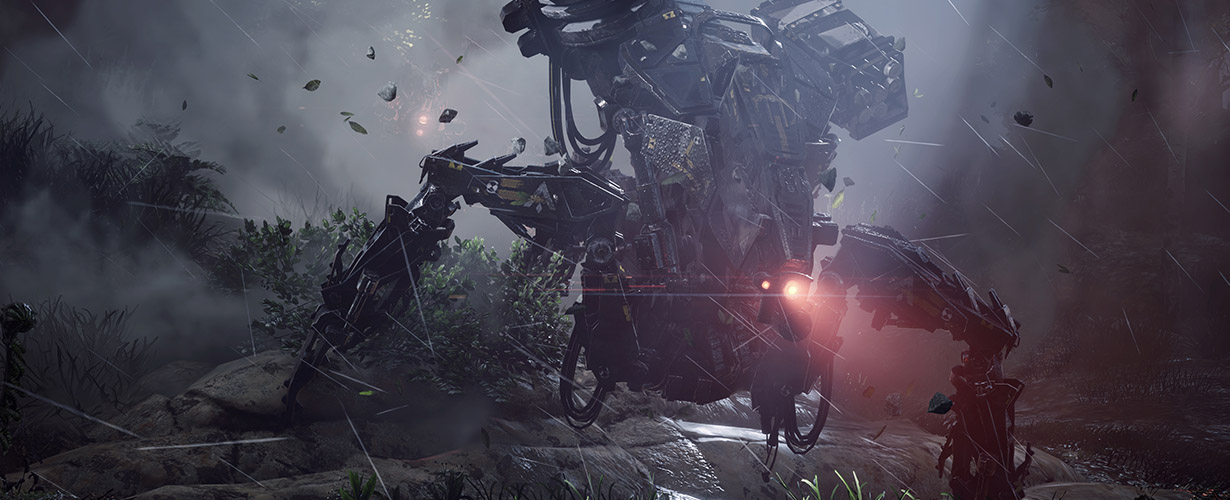
Corrupter
- Weakness: spiked launcher and grenade launcher are vulnerable to demolition, heat core is weak to any attacks; because the Corrupter is a corrupted machine, it is vulnerable to fire
- Behavior: very agile due to large jumps, also dangerous in melee and ranged combat
- Strategy: uses demolition arrows to detach the components spiked as well as grenade launchers from the Corrupter and disable the corresponding attacks; makes this enemy type overheat with fire attacks so that the machine core is revealed. Hits on it are particularly damaging.
- Override: not possible
- Loot: Metal shards, metal fire, medium machine core (rare), corrupter lens (uncommon), corrupter heart (rare), glowing braid (rare)
Petrel
- Weakness: tan container (fire & demolition), propulsion (demolition), ice container (ice & demolition), lightning rifle (demolition)
- Behavior: flying loner that makes your life difficult at short and long range
- Strategy: pay as much attention as possible to the small icons that indicate the position of your opponents when the Petrel flies out of your field of vision; shoot the Ice and Lohe containers with the appropriate minution to create explosions; shoot Demolition arrows at the Drive and Lightning Rifle to override the Petrel's corresponding attacks
- Override: seeks out hatchery ZETA and overrides core there; cannot be used as a riding machine
- Loot: metal shards, tan, cooling juice, echo sleeve, large machine core (rare), petrel lens (uncommon), petrel heart (rare), crystal mesh (rare)
Stone Crusher
- Weakness: digging arm (demolition); heat outlet as well as fuel pouch are weak against any attacks; body is generally sensitive to ice, but resistant to fire
- Behavior: large machine that responds to loud sounds; digs through the earth to strike with powerful melee attacks
- Strategy: ice arrows, wires, bombs, or traps are generally effective; keep an eye on the small icons that indicate the position of your enemies as the stone crusher digs in; use demolition arrows to dislodge the digging arms from the machine so it can no longer dig in
- Bridging: visits breeding ground ZETA and bridges the core there; cannot be used as a riding machine
- Loot: metal shards, tan, echo shell, large machine core (rare), stone crusher lens (uncommon), stone crusher heart (rare), crystal mesh (rare)
Thunder Jaw is among the most challenging with its numerous weapons.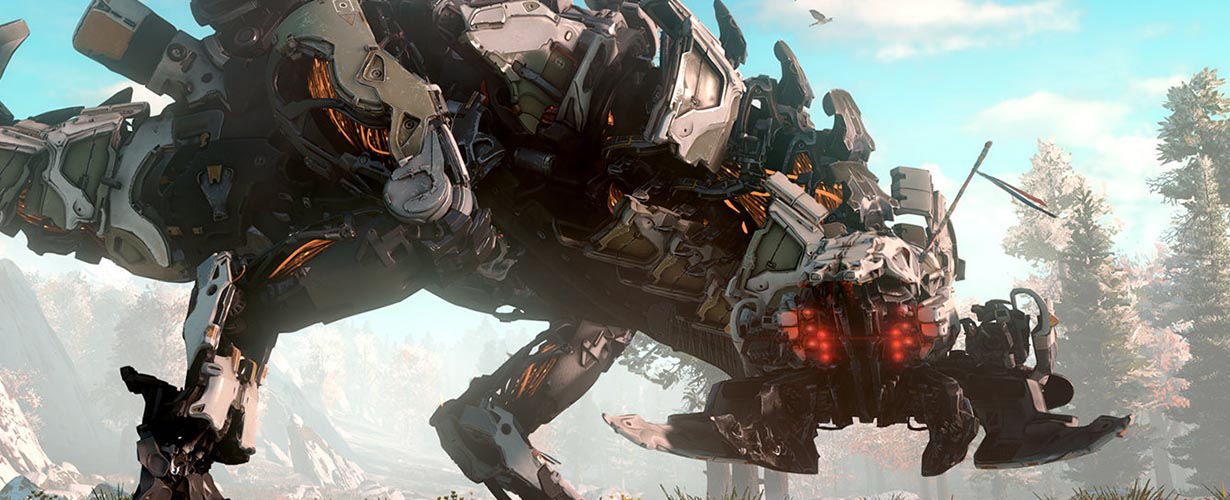
Thunder Jaw
- Weakness: Lohe Tank (Fire & Demolition), Ice Tank (Ice & Demolition), Energy Cell (Shock & Demolition); Also vulnerable to demolition only are Disc Launcher, Radar, Cannon, and Tail; Thunder Jaw's Heart is weak to any attacks.
- Behavior: huge fighting machine that comes up with devastating ranged and melee attacks
- Strategy: demolish as many components as possible to weaken the machine; by the way, you can pick up the disc launcher and use it as a powerful weapon even in battle; corresponding elemental attacks against lohe container, ice container as well as energy cell also trigger explosions
- Bridging: visit breeding ground ZETA and bridge the core there; cannot be used as a riding machine
- Loot: metal shards, detonator, lohe, cooling juice, echo sleeve, large machine core (rare), thunder pine lens (uncommon), thunder pine heart (rare), crystal mesh (rare)
Deathbringer
- Weakness: Vulnerable to any type of attack are repeating cannon gun, cooling rods, core, flamethrower, grenade launcher, vent, swarm launcher, stabilizer, and heavy cannon gun; turret is weak to demolition, while body is weak to shock as well as fire.
- Behavior: Highly aggressive war machine that makes short work of the unwary.
- Strategy: Best to use fire arrows, wires, bombs or traps to make Deathbringer overheat. Attacks on exposed components (cooling rods, core, vents, stabilizers) will cause a lot of damage. On the other hand, repetitive cannon, flamethrower, grenade launcher, swarm launcher, and heavy cannon disable the corresponding attacks. Separate the turret from the Deathbringer with demolition arrows to use it as a weapon.
- Override: not possible
- Loot: Metal Shards,Metal Vessel, Metal Burn, Large Machine Core (rare), Deathbringer Lens (uncommon), Deathbringer Heart (rare), Crystal Mesh (rare)
More useful guides for Horizon Zero Dawn:
- Find & sell or trade crystal weave
- Solution to Hatcheries & Bridges
- Solution for energy cells & shield weaver outfit
- All metal flowers & Banuk figures at a glance
Visit us on Facebook and Instagram to discuss your favorite games!