Gears 5 Collectibles: Find all collectibles
In this guide to Gears 5 you will learn:
- Which collectibles can be found in the individual acts and chapters of the campaign.
- Where these collectibles are located.
Gears 5 () offers an action-packed and wonderfully staged single-player campaign that will easily keep you glued to the screen for 12 hours. On the other hand, if you search every area for the collectibles to unlock the right achievement, you'll need a few hours longer. Nevertheless, it can easily happen that you miss one of the collectibles in the hectic firefights.
Speaking of Achievements: You can find all the achievements in our Gears 5 trophy guide, and a number of good tricks for beginners can be found in our Gears 5 tips guide. We have also put together a walkthrough for the entire campaign of Gears 5 for you if you get stuck in the chapters.
Our solution to the collect ibles in Gears 5 shows you where the collectibles are hidden in the individual chapters of the four acts. That way, you're sure not to miss any of them.
Collectibles in Act 1 of Gears 5
Act 1 includes a total of four chapters in which you can find 26 collectibles.
Chapter 1: Blind Shot
Weathered Spectacles: Once you can control your character in this chapter and have rappelled down, head a bit to the right where you can find the Weathered Spectacles on a rock.
Onyx Guard Challenge Coin: After leaving the water and walking towards the main path, take a small turn to the left. There you will find the Onyx Guard Challenge Coin on the ground.
Wellness Poster: Later, inside the facility, you will come to a washroom if you follow the main path. There you will find a poster hanging on the wall that you can collect.
All collectibles in Gears 5 in the walkthrough.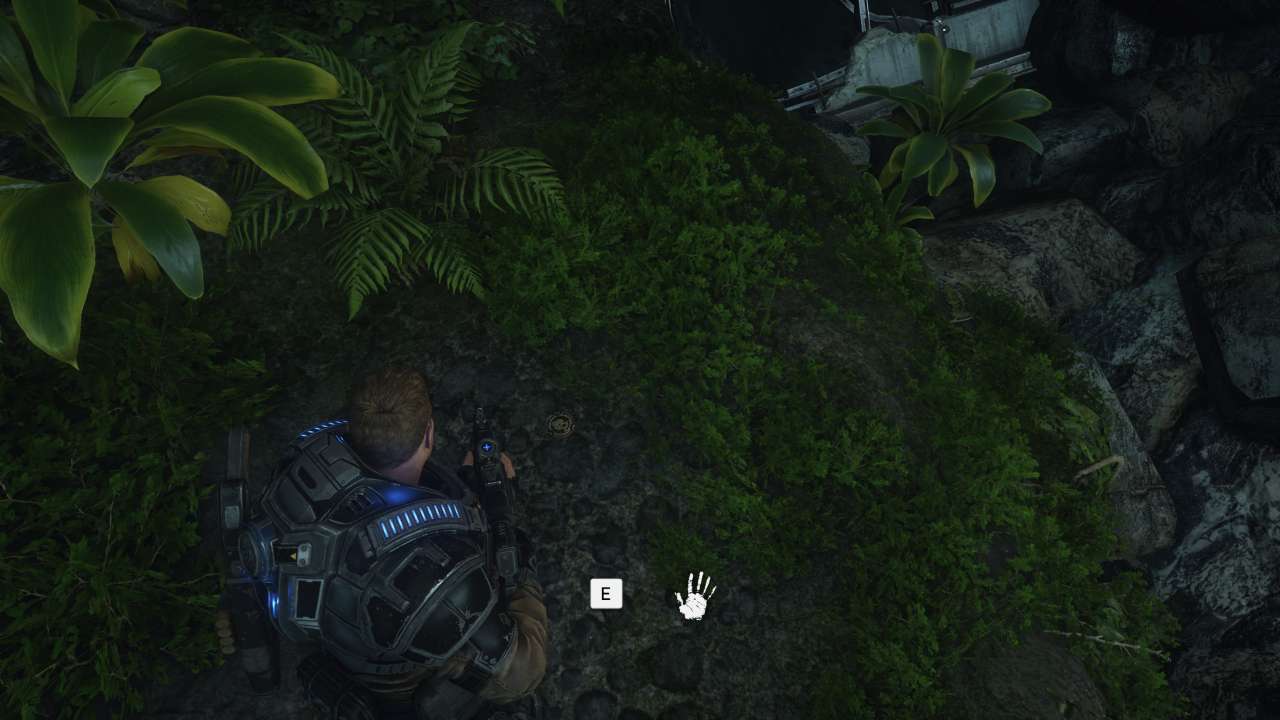
COG Tags: Fallen Azura Gear: Just before you enter the commander's office, there is an entrance to the armory in the antechamber before you go up the stairs to your destination on the left. Inside, there are a few corpses on the floor where you pick up the COG Tags.
Chairman's Wristwatch: Now make your way back to the commander's office. On the left hand side you will come to a dark room past. Instead of following the corridor, go into the room and grab the wristwatch lying on the desk.
Mission authorization for light mass rocket: On the further way to the commander's office, you will first encounter a fight, after which you will have to send Jack into a ventilation shaft to continue. In the far left corner there is a door to another room, where you can pick up the next collectible on a console.
Hammer-of-the-morning-red scheme of the UUR: Once you have finally arrived at the office of the commander, march into the room opposite. There you will find another collectible on the desk.
All collectibles in Gears 5 in the walkthrough.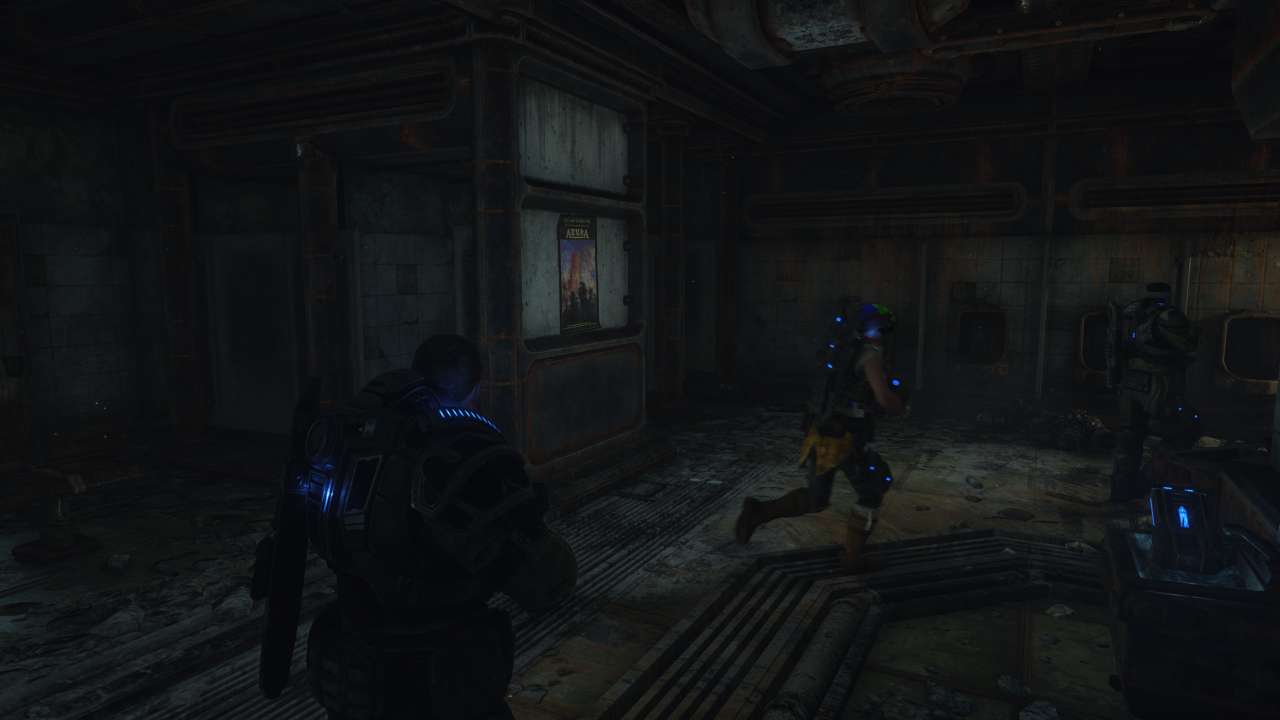
Chapter 2: Diplomacy
Photograph of Kilo Squad: Once you have control of your character, run to the desk next to Jack to take the photograph.
Scheme Lancer-MK.3: Right at the beginning of the chapter, you'll get the lightning ability for Jack. In this room, go to the left and look for boxes that are on the wall at the other end. There you will find the blueprint.
Dream Report: Marcus Fenix: In the same room you can pick up another collectible. However, this one is on the right side of the room near the transport carts.
All collectibles in Gears 5 in the walkthrough.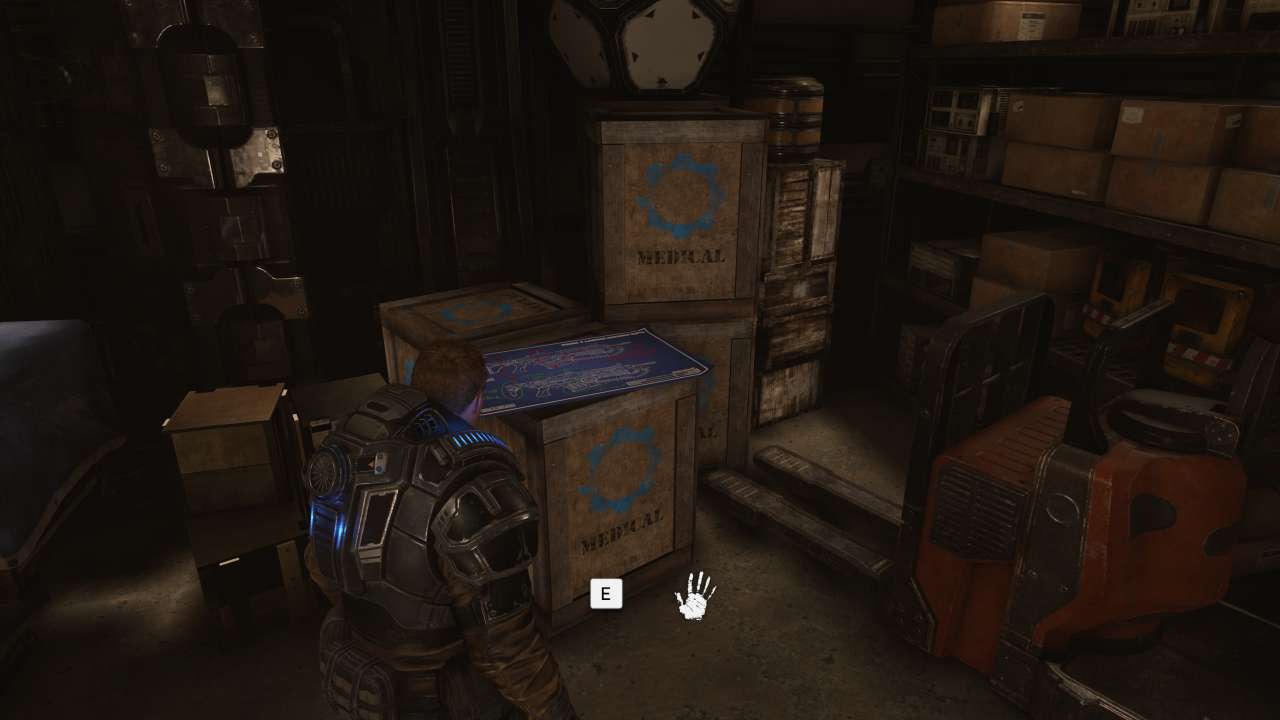
Note from the gym to the trainers: As the chapter progresses, you will get the benefit of a cutscene where you fight Fahz in a training room. After that, run to the left side of the room where there are some lockers. There you will find the note hanging on the wall.
DBI Promotional Brochure: At the entrance door of Jinn's office, there are some chairs on the left side as a waiting area. On one of the seats you will find the brochure.
All collectibles in Gears 5 in the walkthrough.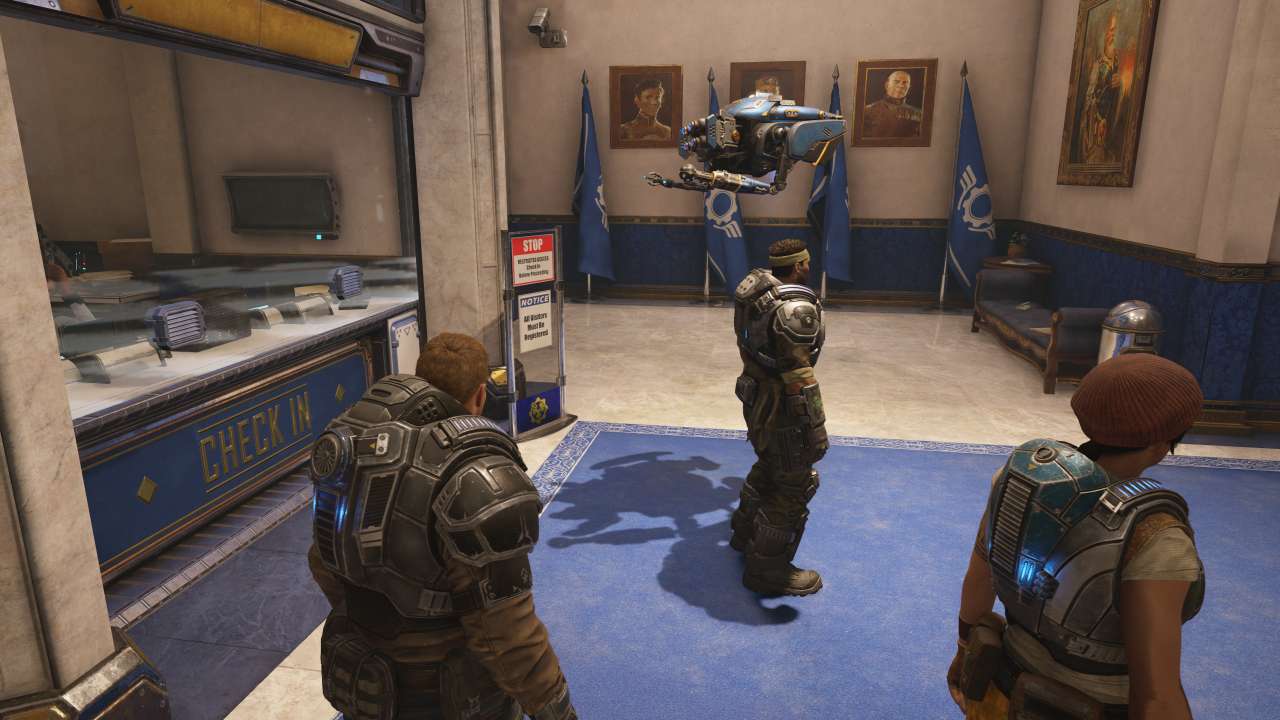
Chapter 3: This is how war works
KOR Tokens: Fallen Raven Pilot: Once you've been freed from your trapped position, look directly in front of you for a fallen soldier. There, take the dog tag to you.
The New Ephyran: 20th Anniversary Edition: After you leave the crash site, you'll enter an office shortly after. In the back of the room on the left side you will find the rarity.
Insurgent Literature: After the first fight, run up the stairs. Then turn around on the upper floor and look for the book on the desk in the corner.
Welcome Pack from Settlement 2: As the level progresses, you'll come to a room full of civilians, whose exit is guarded by a soldier. To the left of it, there is another room with a guitar. There you will find the collectible on the table near the door.
Storied Embry Star: Once you have survived the fight in the street, in which you support your troops, enter the building located to the left of the gate through which the story continues. There, in a wooden chest of drawers on the upper floor, you will find the next Collectible.
KOR Tokens: Fallen Gear at Condor Crash: After you make your way through the park, there is the wreckage of a Condor plane near the bridge. There are some destroyed guard robots there, but also a dog tag that you collect.
Serian Colossus: At the end of the mission, you will fight a horde of larvae on a road. At the end of this street is a bookstore that you can enter. In the middle of the store is a display area with bronze statues. There you can collect the last collectible of this chapter.
Chapter 4: The Tide is Turning
Message to the Bomah Hotel staff: On the way to the hotel you will come across a warehouseinto which you are to enter. In front of it is the loading area with trucks and an open gate. Jump in there, because there is a collectible on a table.
KOR Tokens: Fallen Gear at the hotel: if you then follow the actual path into the warehouse, you will pass a dark storage room with a blue door. Inside you will find a dead soldier and take its dog tag.
Lost plush horse: Inside the hotel, after a fight against enemy guard robots, you will pass a golden door and enter a hall with a fountain or indoor garden. At the very back below the stairs, the stuffed animal is waiting for you.
All collectibles in Gears 5 in the walkthrough.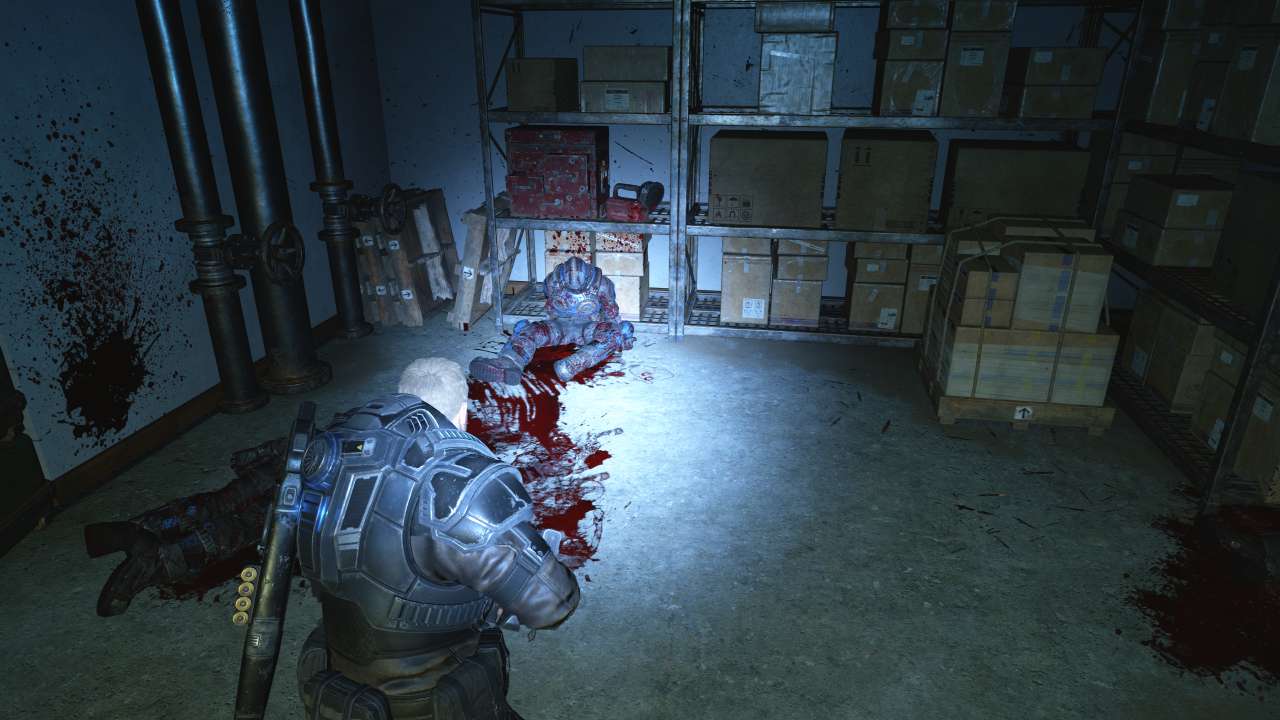
Settlement 2 - Birth Leaflet (Summer): Now run up the stairs and look around for a decorated table with balloons. On it you will find a pamphlet to take home.
Lyrics: Once inside the theater, follow the path until you reach a large corridor. To the left is a fitting room, which in turn has a smaller room attached to it. To the right of its entrance is a table where you can pick up the lyrics.
All collectibles in Gears 5 in the walkthrough.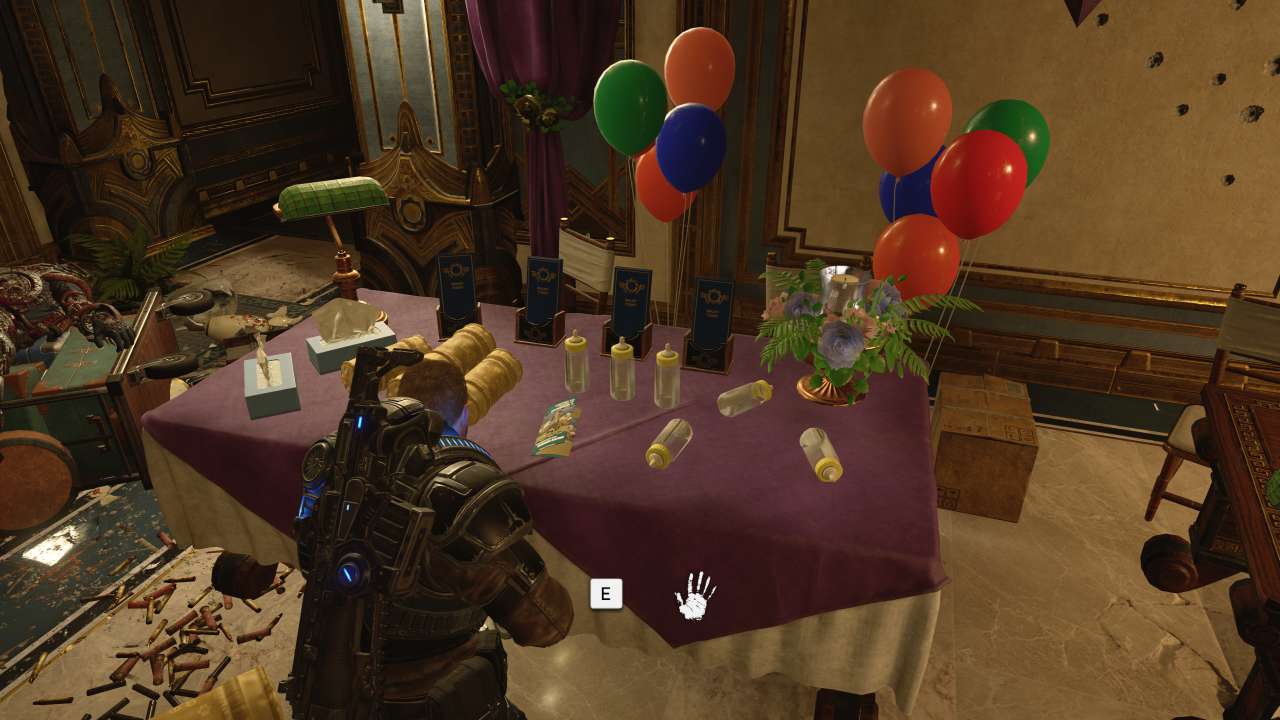
Taken lighter: The further way through the theater leads you backstage. There, right by the stairs at the entrance, is a lighted dressing table with the lighter on it.
Octus Canon Scroll Prop: Run backstage to the far end of the room. On some crates behind the curtain, the prop is waiting for you.
Collectibles in Act 2 of Gears 5
Act 2 includes a total of five chapters, in which you can find 36 collectibles.
Chapter 1: Recruitment Offensive
Hand Carved Riftworm Flute: Right at the beginning of the village, run down the stairs and go through the yellow doorway. Inside this store, you will find the flute on the table.
Ilima City License Plate: As you make your way through the village, you will pass by a blast furnace of sorts. There, take the license plate into your possession.
All collectibles in Gears 5 in the walkthrough.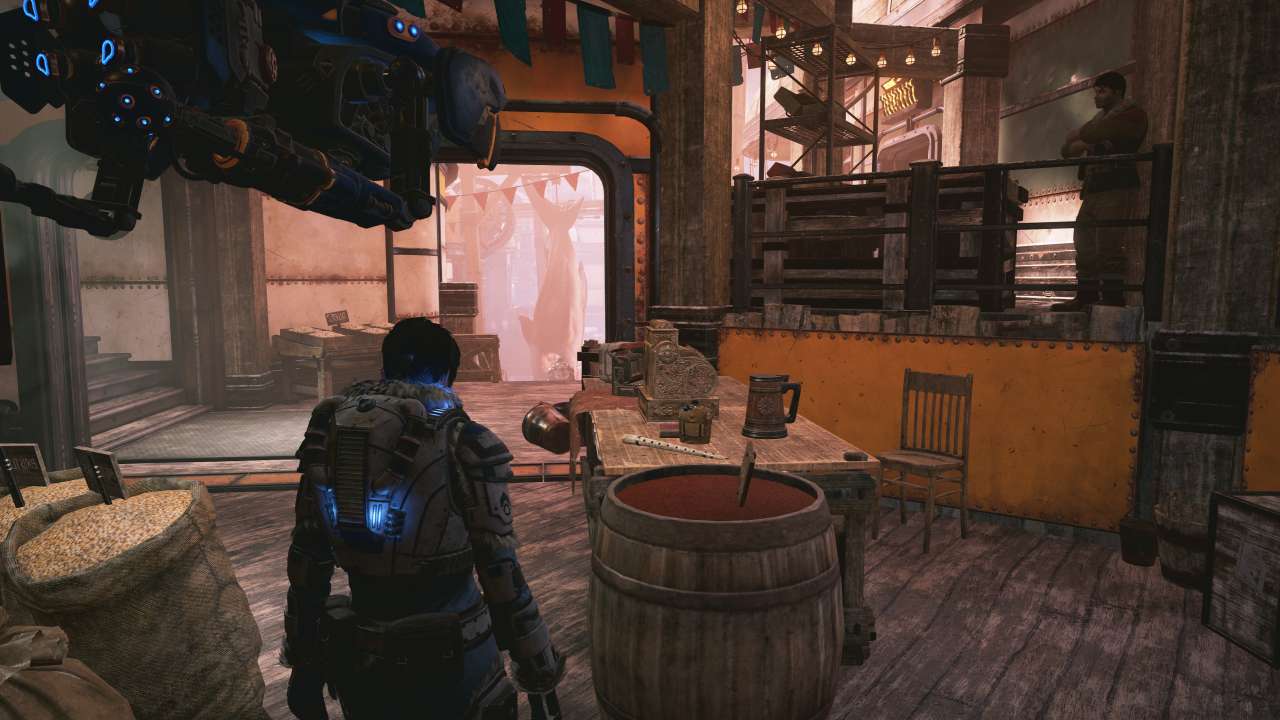
Lost Gear Helmet: Relatively centrally in the village you will come to a place where there is a large, colorfully painted bone sculpture. Behind this you will find the helmet on the left side in the bushes.
Lancer Wooden Toy: In the course of exploring the village, Kait encounters a young boy who pretends to shoot at you with a toy gun. Wait for this to happen, because when the gnome runs off, he leaves his wooden gun on the right side of the road.
Major Howl and the Battle Ants: As you continue down the main street, you'll pass another store called Salvage N' Trade. Inside you will see two lanterns and right next to them is the collectible.
Order to the new village order: At the end of the street you will come to a workshop, which you have to visit anyway in order to progress. There are some lockers on the left side. There hangs the note that you take with you.
All collectibles in Gears 5 in the walkthrough.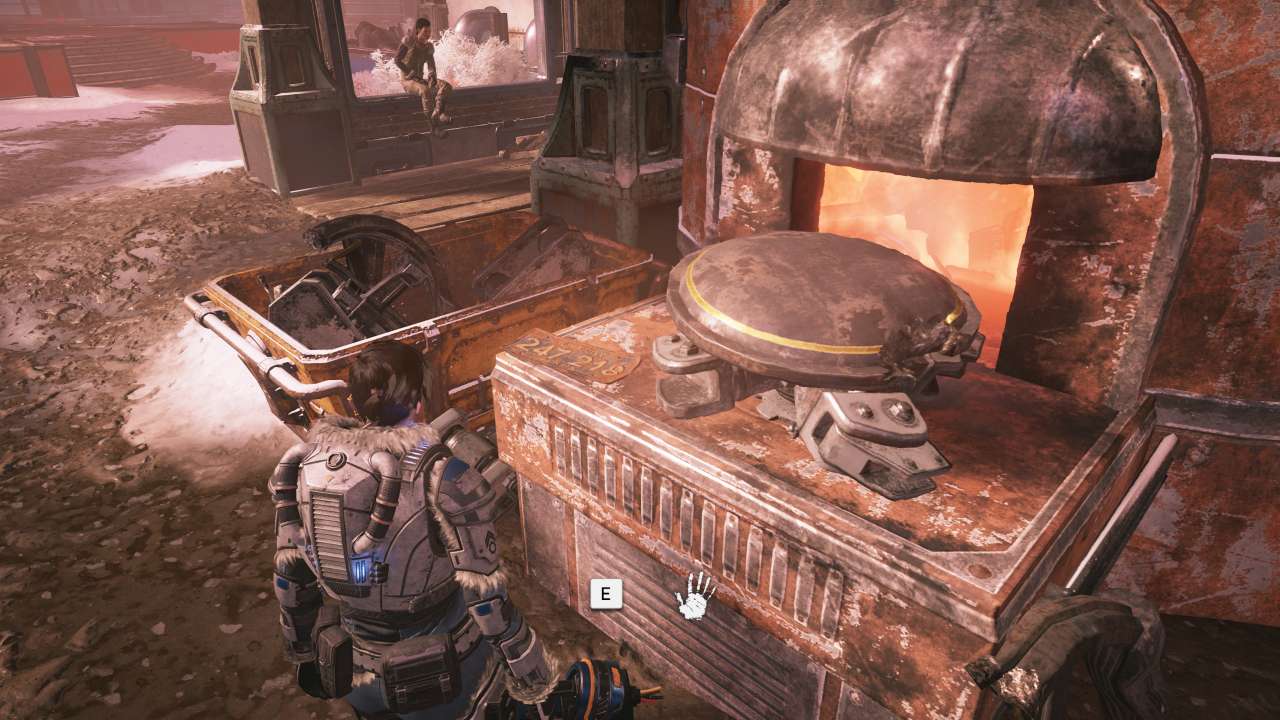
Note to the Chief: As you continue on your way, Kait gets a vision. As soon as it's over and you can see normally again, run to the yellow building that's directly in front of you. There's a note on a wooden table that you can't miss.
Norsko's Letter: When you finally reach the end of the village - your destination - keep right on the path and pass some old tires. There are wooden crates there and on one of them lies the letter for you.
Nonkon Skiff Scheme: Towards the end of the mission, a raid starts and you make your way back through the village. Once you are back near the blast furnace, look for a workshop on the left side of the road. There is a mech in it and to the right of it you can dust off the blueprint on a container.
KOR Tokens: Oscar Diaz: At the end of the chapter, you'll be in the skiff's garage. There you will find a computer in front of a red cabinet and right behind it, in the left corner of the room, you will put the dog tags in your pocket.
All collectibles in Gears 5 in the walkthrough.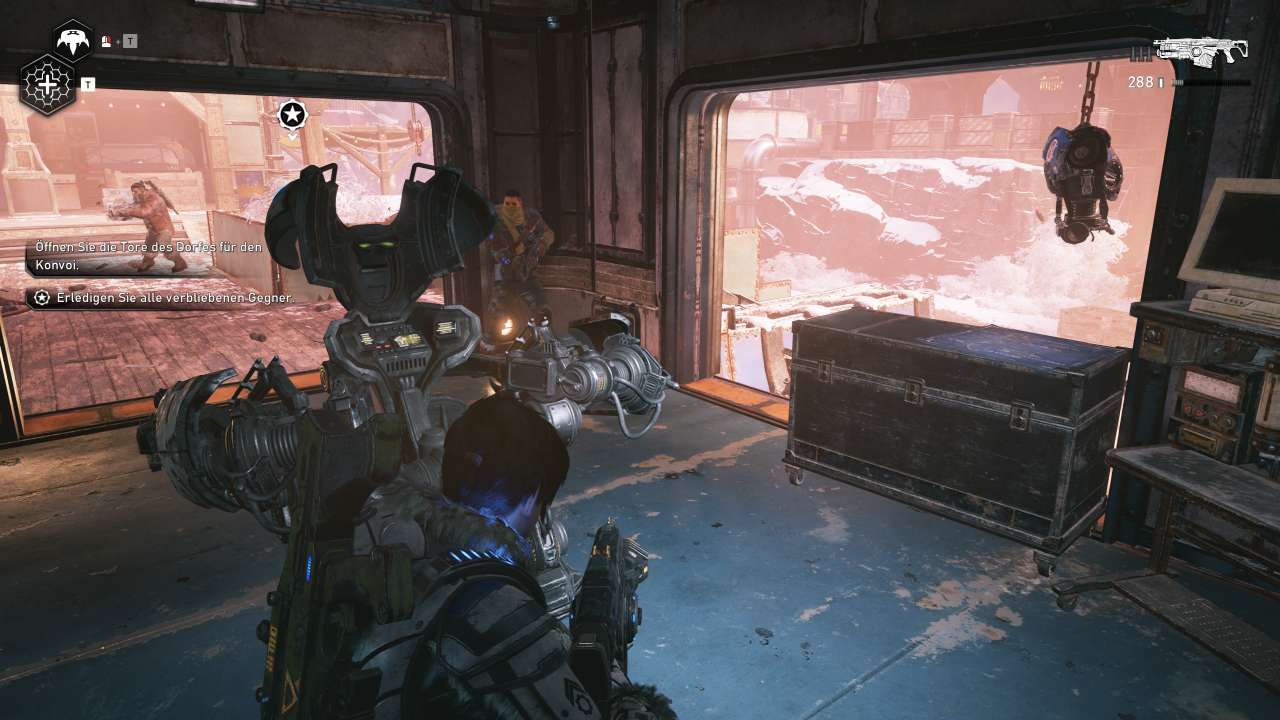
Chapter 2: Into the Wild
Grindlift Maintenance Records: In the northwest you will find tracks, which you follow to a tunnel entrance. Enter the tunnel via a small rock entrance to the left of it and cross the cave to the end. There you will find a wagon, but behind it a carrier is waiting as an enemy. When the beast is defeated, enter the wagon and take the note.
Faded Photograph: When you exit the tunnel, follow the tracks until you come to another wagon standing in the middle of the wilderness. Inside you'll find a corpse with the photograph lying next to it.
All the collectibles in Gears 5 in the walkthrough.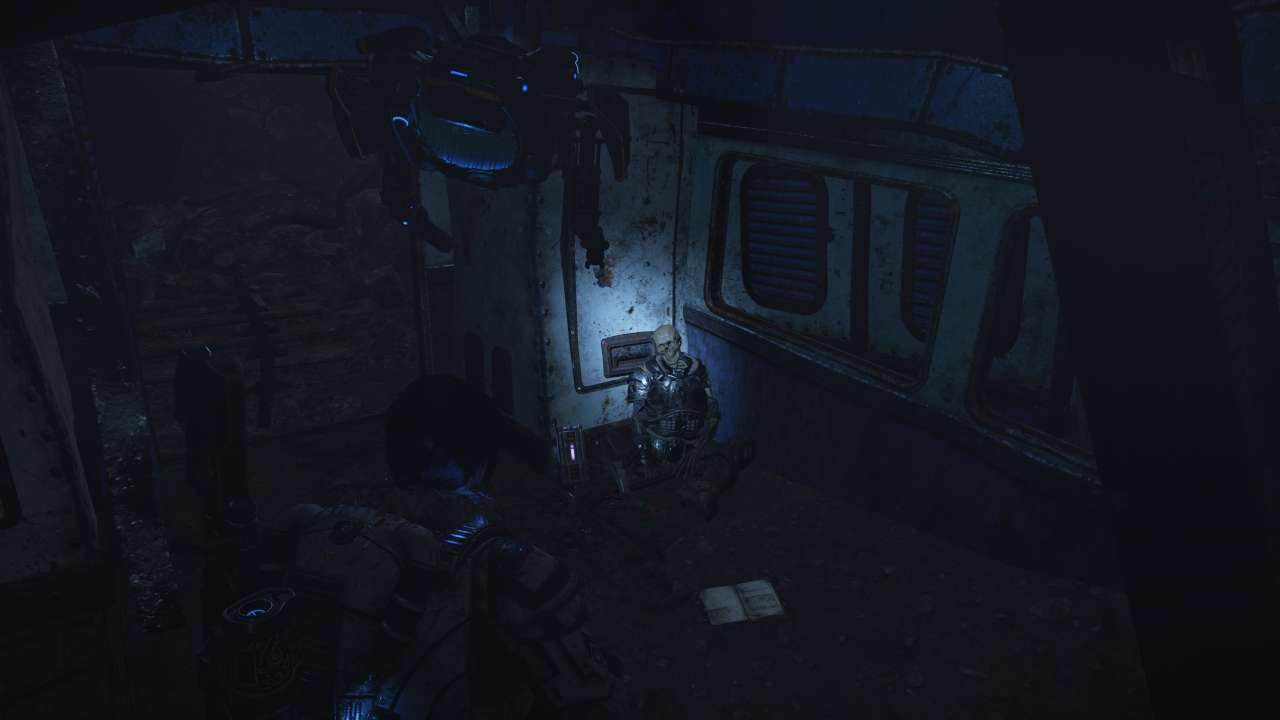
Lena's Journal: Once you reach the New Hope mission point, you'll have to continue on foot and quickly arrive at an abandoned camp. There you will find the journal near the fireplace.
Islander's Lost Earring: As the chapter progresses, you will have to open a huge closed gate. Not far from this gate, there is a wrecked vehicle lying next to a corpse. Insert the earring there and you will have found all the collectibles of the chapter.
All collectibles in Gears 5 in the walkthrough.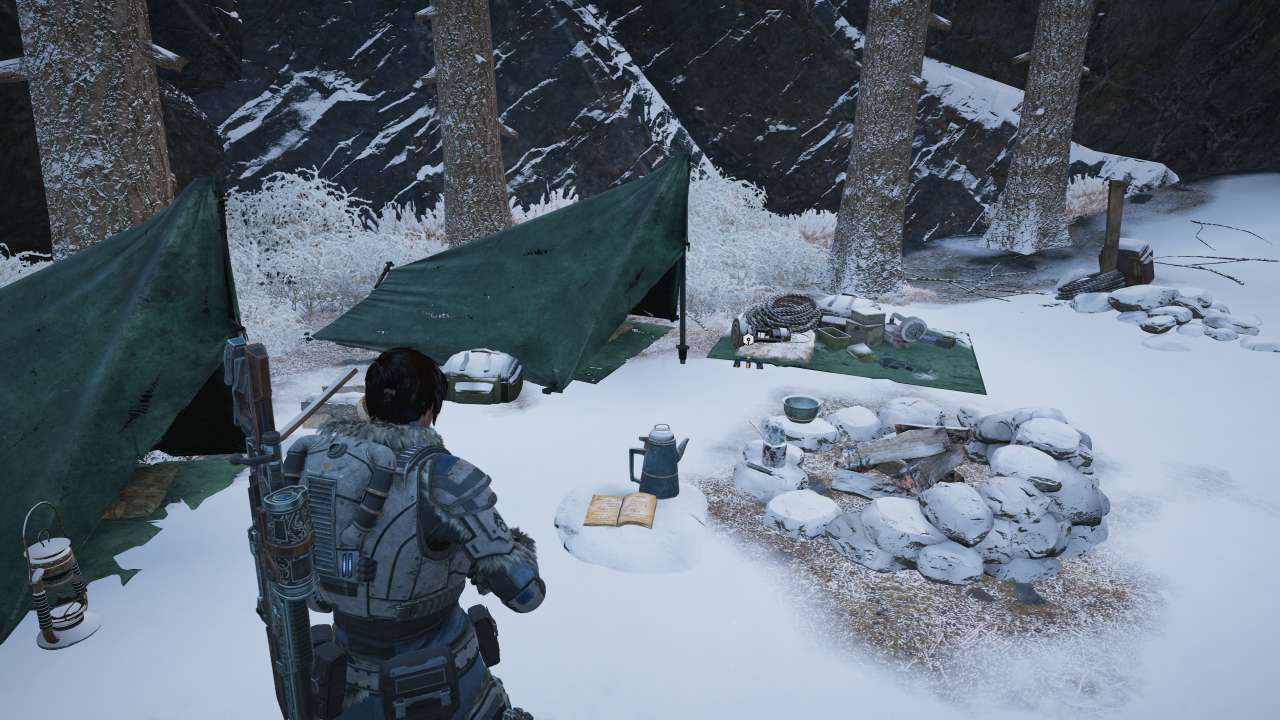
Chapter 3: No forest, only loud trees
Intercepted Letter: As soon as you enter the New Hope research station, you will stand in the entrance hall where you will find a locked gate on the right. Next to it is a desk on which the letter lies.
Sovereign Directive 10345: After falling into the cell block, exit the room and turn right in the hallway. There you will see a locked door, which Jack can open. Behind it is a room with a desk where the directive is waiting for you.
Patient Analysis AX-331-2: When you leave the previously mentioned room, go to the right, which will lead you to a laboratory. There you'll spy a bloody operating table and right next to it lies the patient file.
All collectibles in Gears 5 in the walkthrough.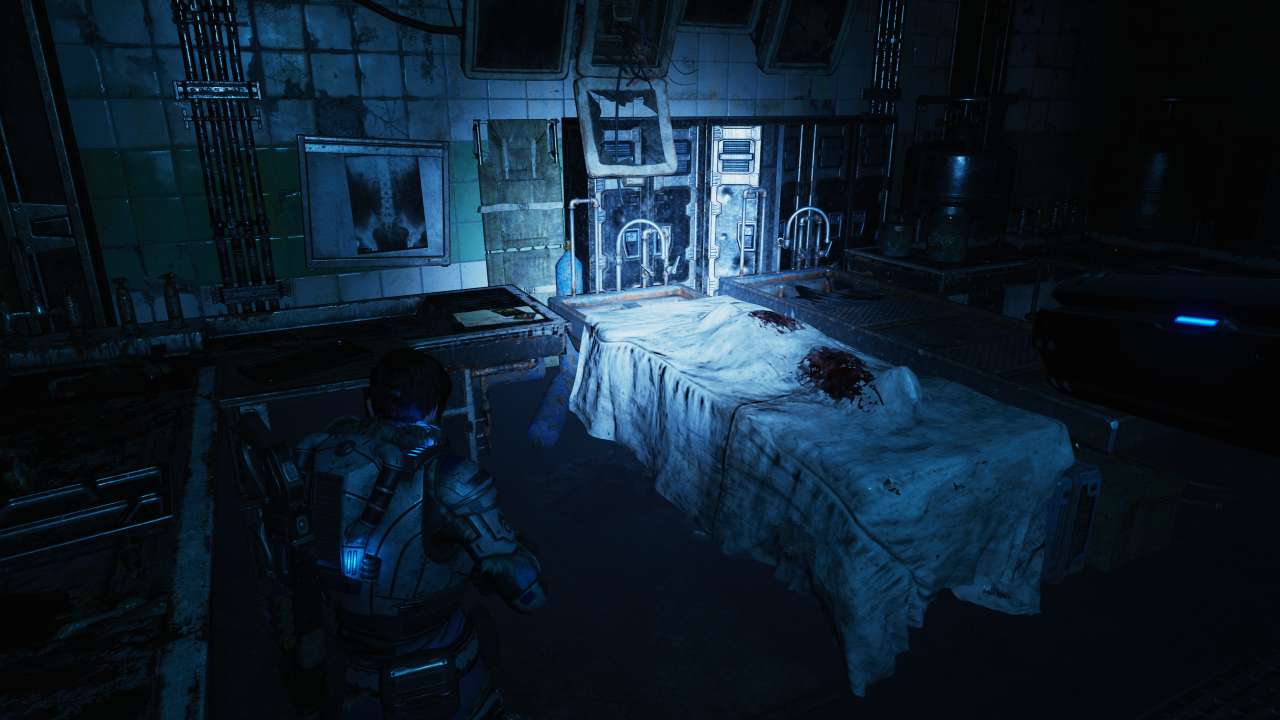
Patient Analysis EV-184-9: After you have explored the station further, you will reach an observation room that is set up like a room for toddlers. Here, jump through the observation window. In the following room, there is a desk with a computer on the left side and the next patient file is on the right side of the PC.
Patient Analysis RK-619-4: Deeper in the lab you will pass a container in which a monster is preserved. After that follows a long, dilapidated corridor where you jump down a small ledge. Then enter the first room on the right, where a corpse lies on an operating table. Next to it you will find the last patient file.
All collectibles in Gears 5 in the walkthrough.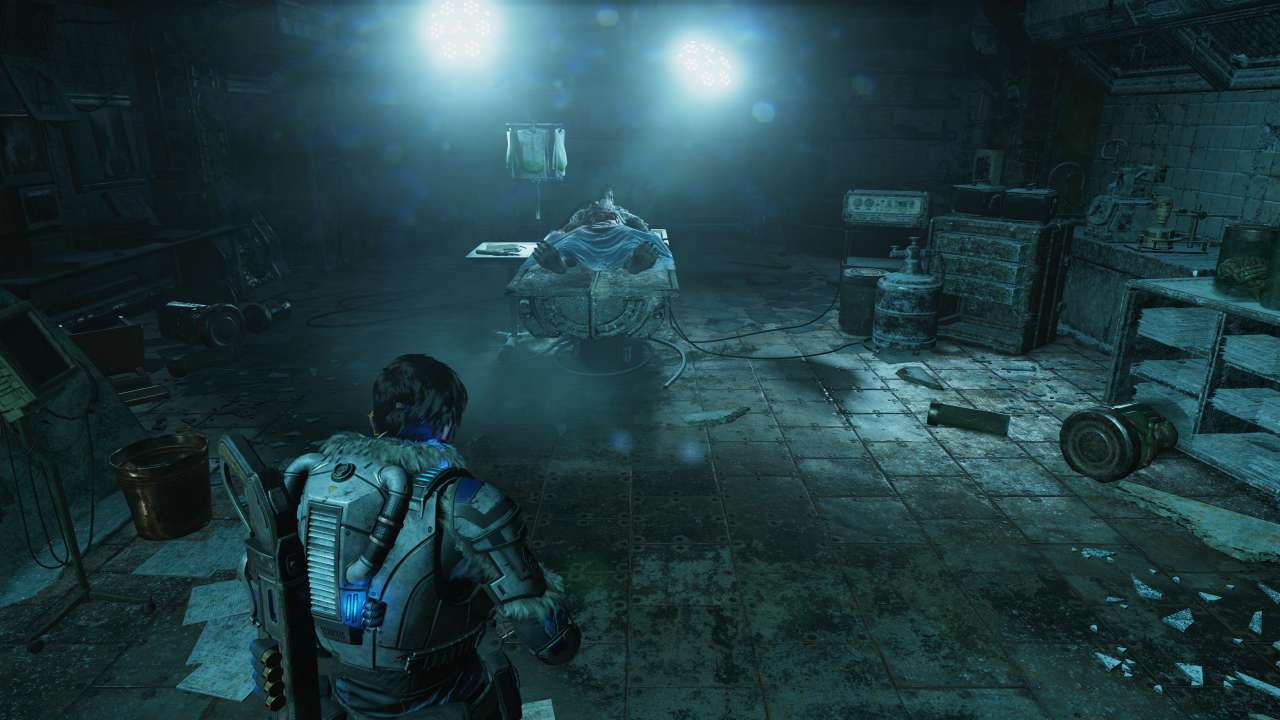
Timeworn Data Drive: In the first server room you enter, there is a hard drive on the shelf immediately to the right, just waiting to be taken.
Chapter 4: The Source of All Evil
Security Memorandum: At the point where the path to the eastern radio tower starts, to the left of it there is a Transformer Station. Inside you will find the collectible in the back right corner of the side room.
Krav's Locust Tag: South of the radio tower in the north you will find an old oil rig. Before you enter it, keep to the left at the entrance. There is a skeleton with a dog tag that you can take with you.
Grindlift Actuator Component: Inside the drilling tower, climb onto the destroyed vehicle. Behind a yellow panel lies the next collectible.
All collectibles in Gears 5 in the walkthrough.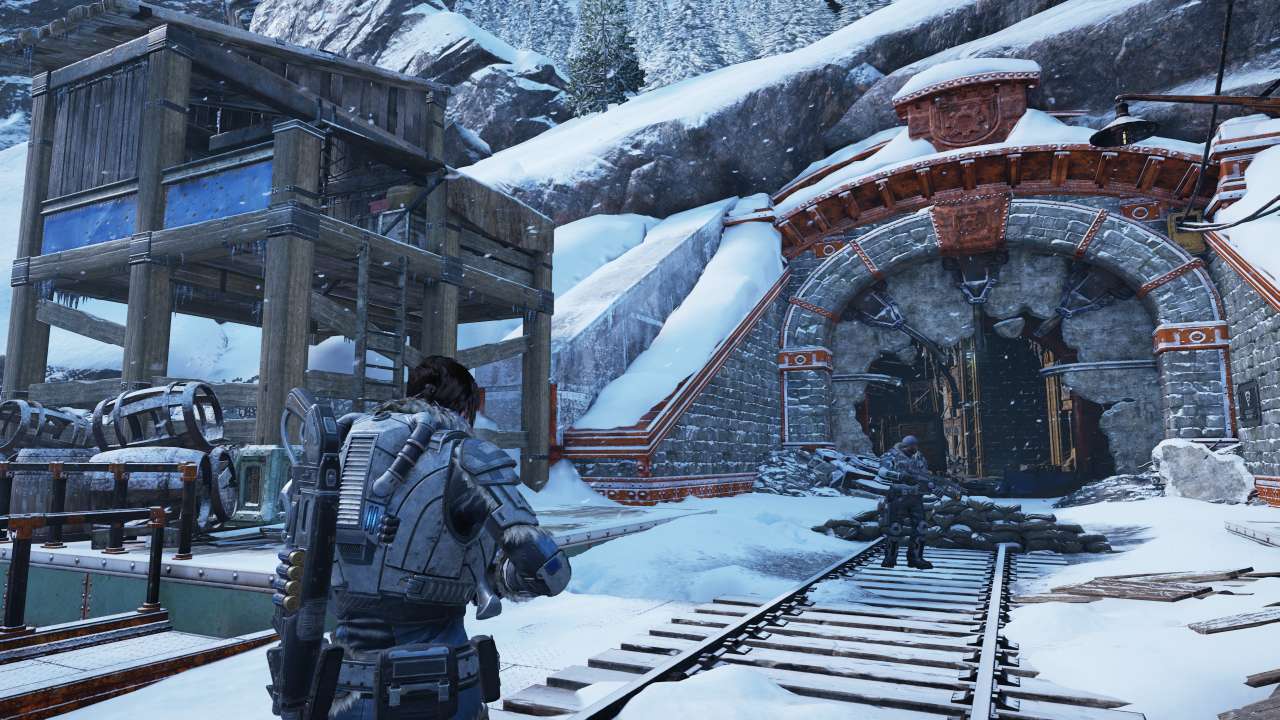
Lena's Scribbles: At the entrance to the northern radio tower you will once again find a substation. On the keypad to enter the security code that opens the door, there is a note and with it the next collectible.
Orders From Ketor Skorge: Southeast of the northern radio tower, there is another old drilling rig, which can be found very close to the large frozen lake. To the right of its entrance you'll find a skeleton buried under rubble. The poor guy has the orders with him.
Grindlift Radiator Component: Inside the drilling tower, run to the very end of the area, where you'll discover a large vehicle. Climb up and once again open a yellow panel. This will start a fight, after which take the component.
Letter to Momma: West of the entrance to the eastern radio tower is a bridge made of ice. Drive across it and then continue until you find a wrecked tank buried under snow. There the letter lies on a crate, held by a lantern.
Frayed-Pouncer-Tooth Necklace: Just before you enter the interior of the mine, there is a kind of watchtower to the left of the entrance gate. Climb up this, because that's where the necklace lies on the ground.
All collectibles in Gears 5 in the walkthrough.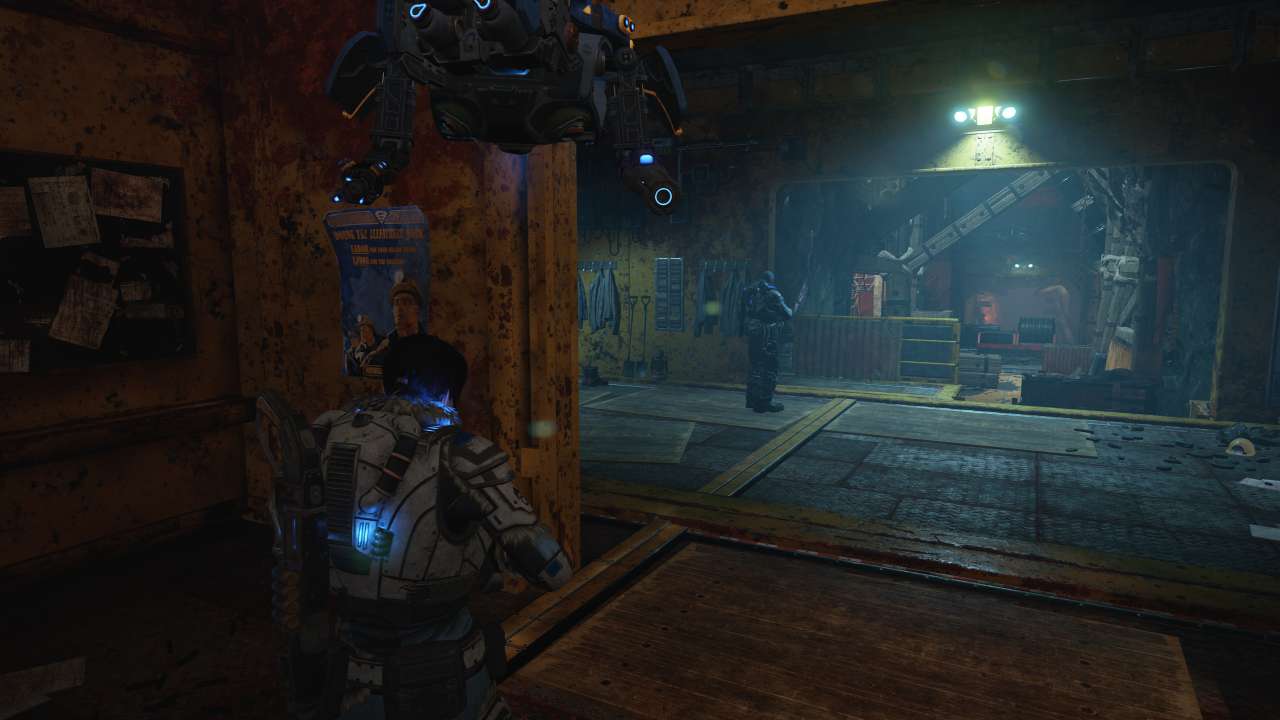
Nethercutt Mining Poster: After you have pried open the metal door inside the mine and crossed it, you will first see some lockers directly in front of you. However, enter the room to the right of them, because that's where the poster you're looking for is hanging on the wall, on the right side of the doorway.
Nethercutt Miner's Journal: On the left side, you'll see an area decorated with paper lanterns. There you'll find a sort of recreation room, where the journal lies on the table.
Chapter 5: Dirty Secrets
Nethercutt Helmet: From the locked gate guarded by guns, a passage leads behind you through the ice. At the end, you will come to a place from which a path leads down on the right. Central on the icy surface down there lies the helmet.
Subject Analysis: UL-119-2: Inside the lab, follow Niles to the room where you have to turn off the icing. Niles then passes some soldiers at their position on the right, where a ramp leads up to a locked door. Enter this and grab the documents at the opposite end of the room.
Subject Analysis: TE-872-3: Later, at the end of the cutscene where Kait holds Niles at gunpoint, the next folder is directly to your right.
All collectibles in Gears 5 in the walkthrough.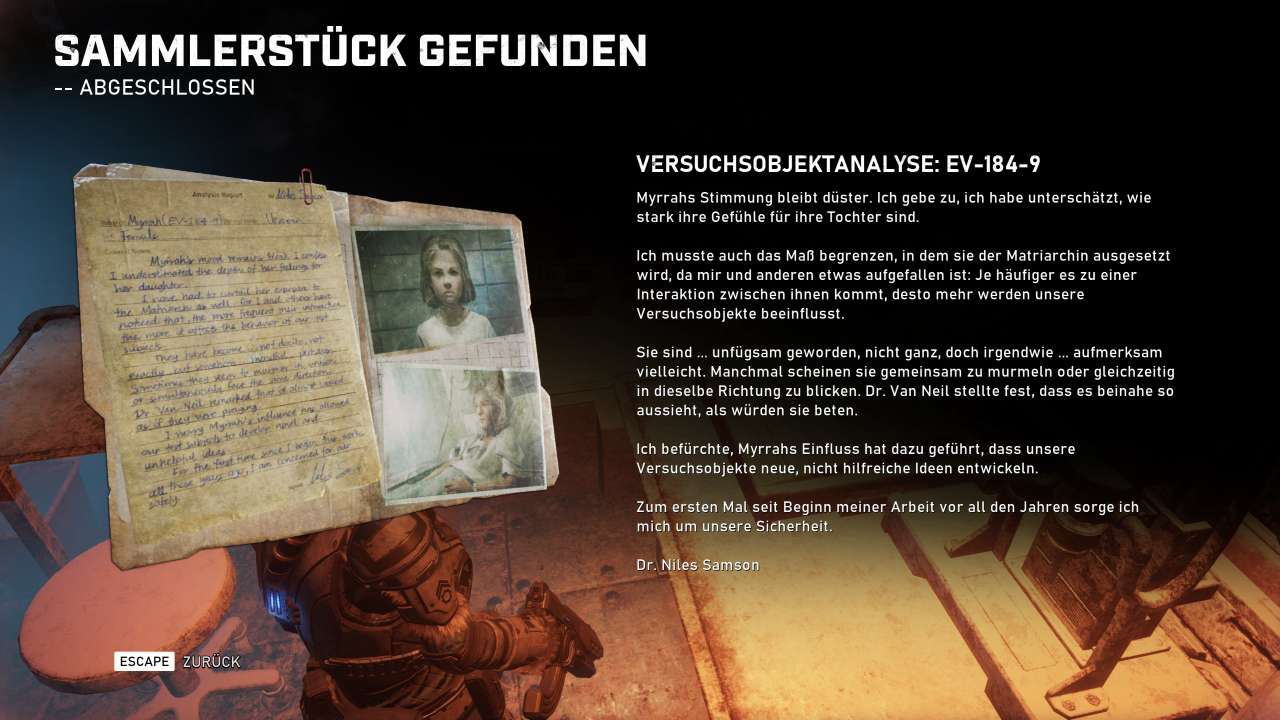
Lexigram Board: Deeper inside the complex, you'll have to cross a room with the Stim ability to turn off a generator on the other side and thus cancel the icing. Right next to it is a skeleton, from which you take the collectible.
Subject Analysis: EV-194-9: Later you will find the corpse of Niles and unlock the facility there. After that, turn around and run diagonally back to the left to the desk where there is another file.
Sketchbook: Leave the room where you found Niles through the door behind him. Just to the left of the door you will find the coloring book.
Collectibles in Act 3 of Gears 5
Act 3 includes a total of three chapters, in which you can find 24 collectibles. The fourth chapter, on the other hand, offers none.
Chapter 1: Battle spirit required
Corisku Newspaper: In the very first room where the chapter starts, the newspaper is on the counter of the bar next to you.
Doomed Empire, Chapter 9: On the first floor, keep to the left and run towards the baggage carousel. There are some wooden crates on the right and suitcases next to them. In between you will find another collectible.
Missive to Agent 9: From the baggage carousel go left and through the broken security gates. Then run to the right, where you will find a room at the end of the building with several computers. There, at the back left window, pick up the next loot.
All collectibles in Gears 5 in the walkthrough.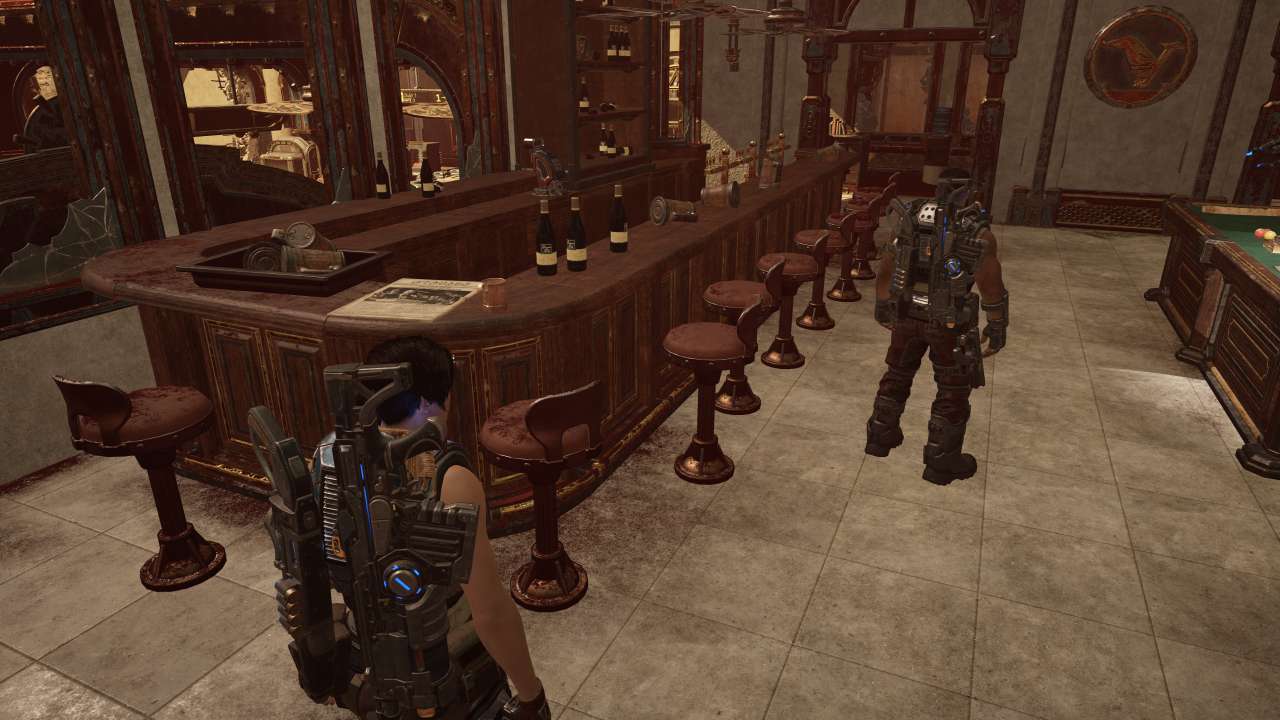
Nomad's Creed: Now run to the place where Paduk is waiting. From there, run to the left past the container where you'll spot a couple of tents. Next to it are two tables, on the back one is a note with a knife attached.
The Astounding Lightning Rangers: Outside on the airfield in Hangar 4 there is a shelf next to the huge helicopter. Inside it is another collectible.
Chapter 2: Rocket Plan
Hammer of Dawn Command Case: In the command room of the missile hangar, where you need to turn on the lights, the case is located in the back right corner of the room right next to a skeleton.
OZP-11 Termination Directive: When you exit the command room, take the first staircase down on the right side. Once at the bottom, keep left and run to the back corner where there are some control consoles and barrels around. On one of the barrels you will find the next object.
UIR Space Mission Brief: Now follow the mission progression until you surprise a couple of enemies, who are tampering with some kind of missile tip. After the fight, your companions continue to the left. You, however, go to the right, jump up a small ledge and go through the door at the top of the stairs into a room. At the end of it lies a corpse and to the right of it there are the documents to find.
All collectibles in Gears 5 in the walkthrough.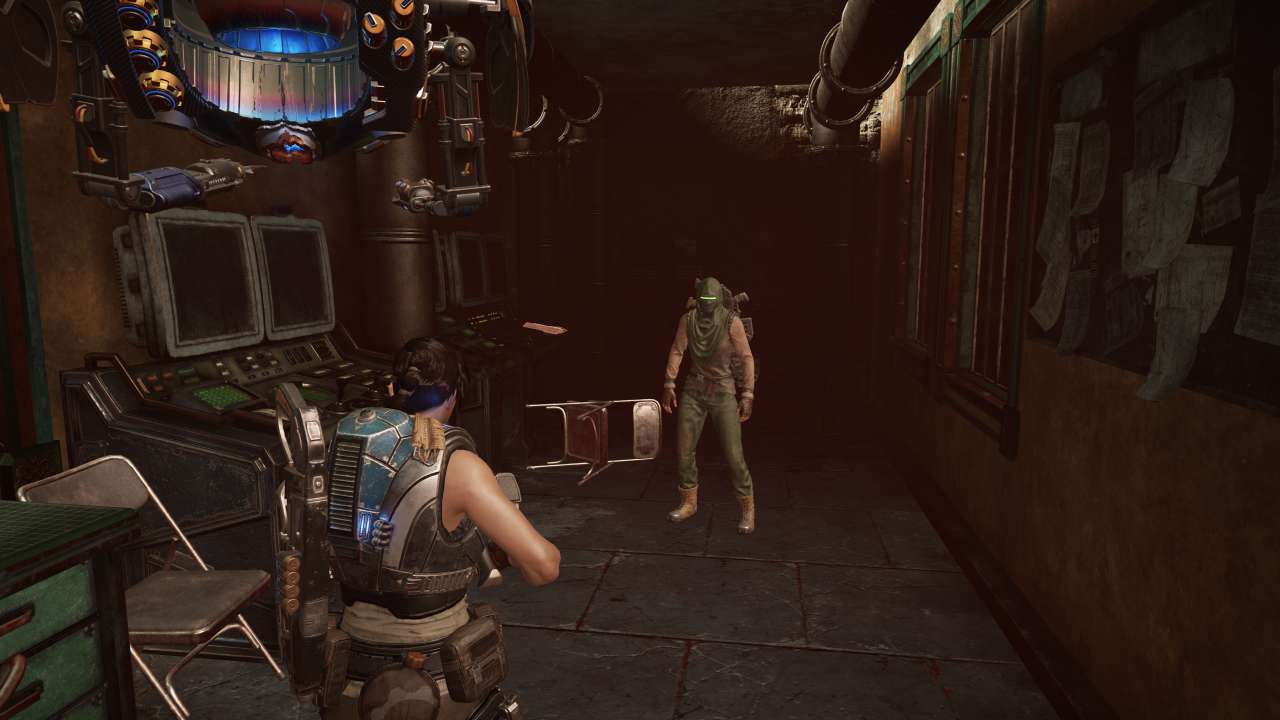
Loyalist Order From Major Toly: Once you've arrived in the main room, where you'll find the satellites the first time, head to the back right corner on the platform. There jump over the sandbags and take the note.
UIR Tag: Major Toly: Later, when you follow the transport of the satellites through the facility, you will come to a room with a wrecked tank. In front of it sits a dead soldier, whose dog tag you take.
The Major's Speech: Now follow the transport further. After several dark corridors you will finally come to a room with two illuminated tables. On the front one you take the speech.
UIR Tag: Lieutenant Melich: Your journey takes you to the hub. In the room where you activate it, you will find the Dog Tag in the corner opposite the entrance.
All the collectibles in Gears 5 in the walkthrough.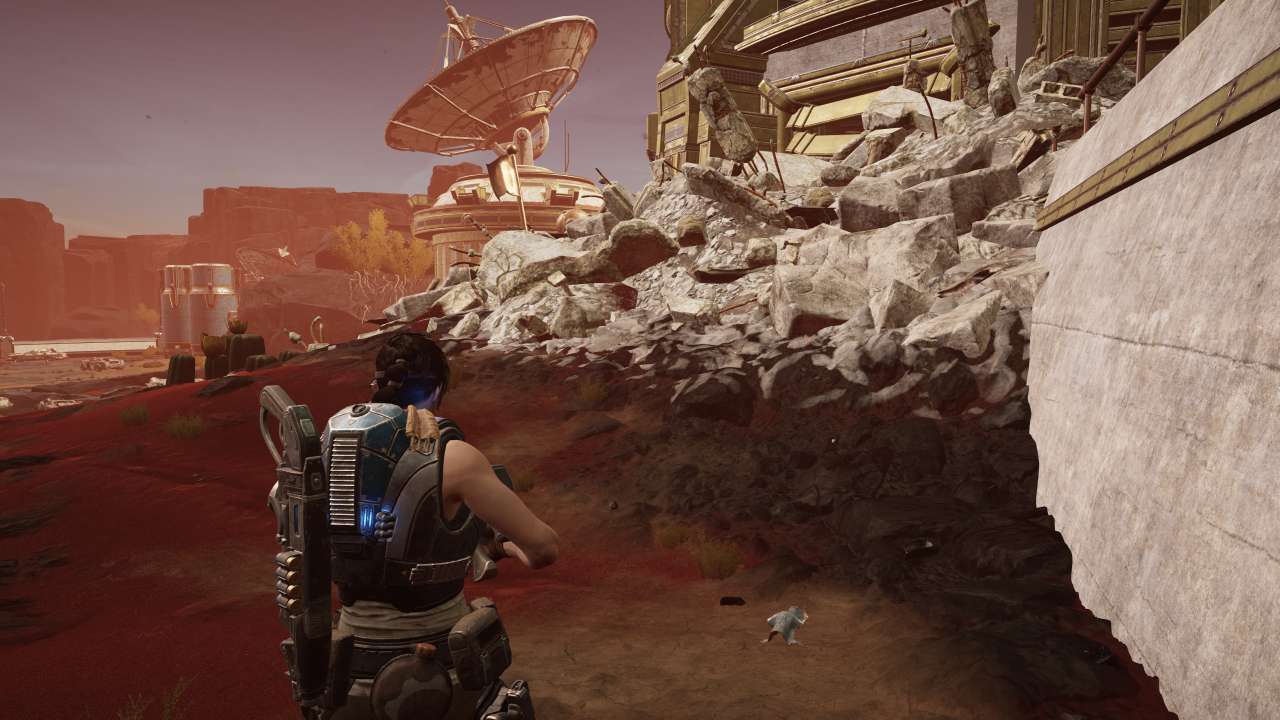
Chapter 3: Assembly required
Nomad's Sketchbook: A side mission will take you to the pump station at the harbor. After taking out all the enemies, open the door to save the person behind it. There you will also find the book.
UIR LC Circuit A1: You can find this item in the ruins, which are also a side mission. They are located slightly to the right of the cosmonaut training facility on the map, where the rocks have a small indentation. Enter the building there and go up the stairs on the right. On the first counter that appears in front of you, you will discover the circuits.
Well-Worn Vasgar Flag: From this point, run back to the skiff using the door on your right. Finally, on the right in front of you, you can see a seedestroyed wall, behind which you pack the flag.
UIR Tag: Fallen Loyalist: Just outside the missile hangar, there is a destroyed tank in front of the slightly golden shimmering turret. There are tank barriers next to it, but there is also a skeleton sitting there that you take his dog tag from.
Loyalist Orders to Lieutenant Melich: Near the docks, there are some broken tanks in the desert (look for the huge rocks nearby, standing around like towers). There is a body trapped under one of the tanks and right next to it is the order sheet.
UIR LC Circuit B1: To the east is a shipwreck that you can clear out as a side mission. At the far end of the area, across from the entrance is a staircase going up. There is a corpse there and the component next to it.
All collectibles in Gears 5 in the walkthrough.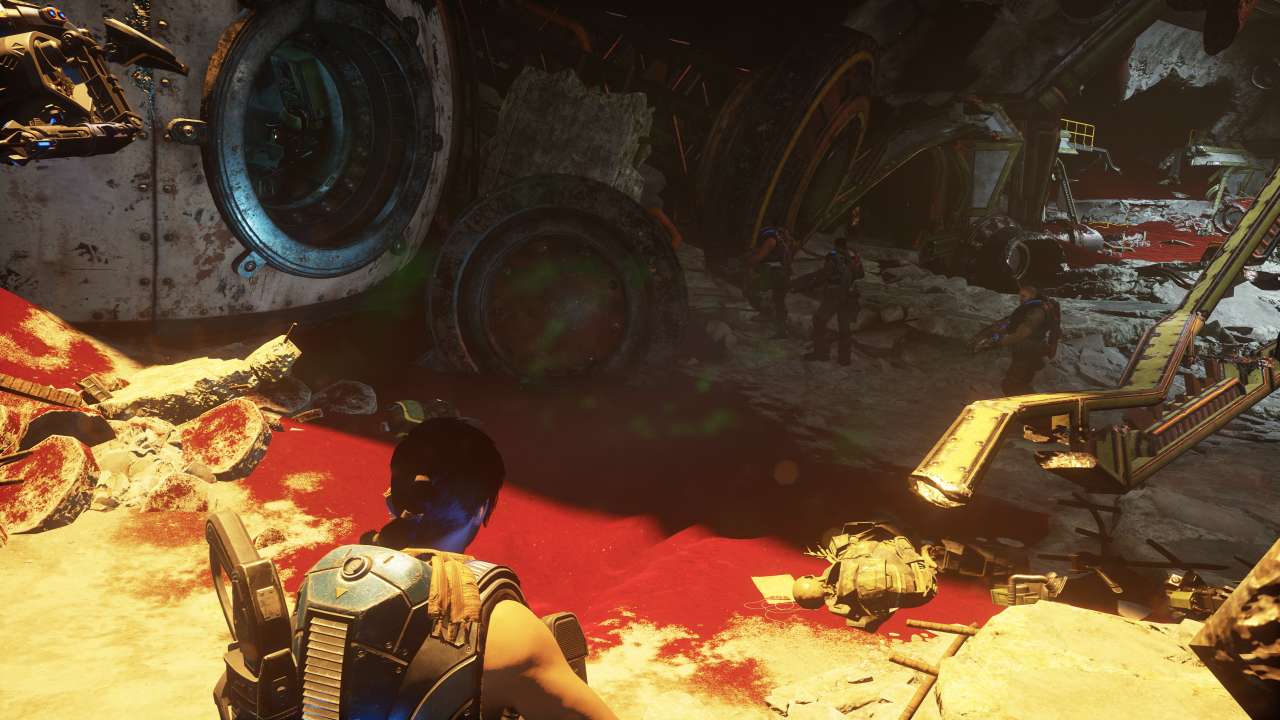
RNV Borascu Captain's Log: In the same area, one of the blue containers is open and there you will also find a dead body and a diary.
UIR LC Circuit C1: About the same height as the shipwreck but a bit more to the west is an artillery base. Once you clear this out, then you can plug in the circuit in the command room.
Emergency Loyalist Radiogram: In the same room just to your left there are more input consoles near the window. There is another object hidden right there.
Lightmass Missile Fragment: Now go to the cosmonaut training facility. On the way to the entrance you'll see a large statue that shows you where to enter. From there, go right and up to the wall of the complex, where you'll pick up the missile fragment.
UIR Tag: Captain Tagger: At the end of this mission, when the centrifuge capsule has flown through the room, you will find this collectible to the left of the capsule.
Fallen Nomad's Visor: Another mission is for you to look for the convoy that was supposed to recover the parts you just secured. Once you enter the area, go around the vehicle at the entrance on the right. There you will find the last collectible from Act 3.
All the collectibles in Gears 5 in the walkthrough.
Collectibles in Act 4 of Gears 5
Act 4 includes two chapters where you can find four collectibles.
Encyclopedia of Tyran Military History: After the mech lifts you into the building, follow the path prescribed by the mission (including passing a piano). In the lower area, the book is in the right corner of the room.
RupturedGear Helmet: On the way to the tomb you will come across a road with a broken van, in the distance you will see a hotel sign. Here turn around and follow the road in the opposite direction. At the end, the helmet is on the left side.
COG Tags: Minh Young Kim: Directly in front of the entrance to the tomb are several wrecked cars. Keep right here and go to the wreck on the right side, which is under some rocks. Pick up the dog tag there.
Restoration Notice: Tomb of the Unknowns: Now run to the entrance of the tomb. To the right of the entrance door you will find the poster.
Visit us on Facebook and Instagram and discuss your favorite games with us.