Days Gone Map - All Syringes, Upgrades and Nero Facilities
This guide to Days Gone shows you:
- The complete map of the game world
- The most important points in it
- All NERO research stations
Days Gone plays with its world. At the beginning, you can only explore one third, then two thirds, and finally the entire map. So as the story grows, so does the open world in the PlayStation 4-exclusive adventure.
There are also numerous important points hidden on the map. Here we show you not only the entire map, but also all NERO facilities and all ambush camps.
Map Guide Table of Contents
- Layout of NERO facilities and ambush camps
- Days Gone: Map of Cascade
- Days Gone: Map of Belknap
- Days Gone: Map of Lost Lake
- Days Gone: map of Iron Butte
- Days Gone: map of Crater Lake
- Days Gone: map of Highway 97
1. Construction of NERO facilities and ambush camps
The main optional ports of call in the world of Days Gone are NERO facilities and ambush camps. The former always come with an injection that you can use to permanently improve protagonist Deacon's health, stamina and concentration.
NERO facilities are divided into research stations and checkpoints. The former are usually smaller and come with a minimal challenge - such as jumping over a ravine. Control points are small camps that often have freakers or enemies running around.
Once you've eliminated them, you should quickly unscrew all the speakers from the huts and shoot from the spotlights. Your task is to fill the generator with gasoline. If you have done this and not destroyed all the speakers, the following noise will attract hordes. If you miss something, shoot it quickly.
Ambush camps, on the other hand, always mean that you should kill all the enemies. It's best to sneak here, as you'll save ammunition and gradually decimate the superior numbers. After that, you'll have to find a hatch that leads to a map and reveals a part of the world on your map. This is the only way to get an overview of the entire area.
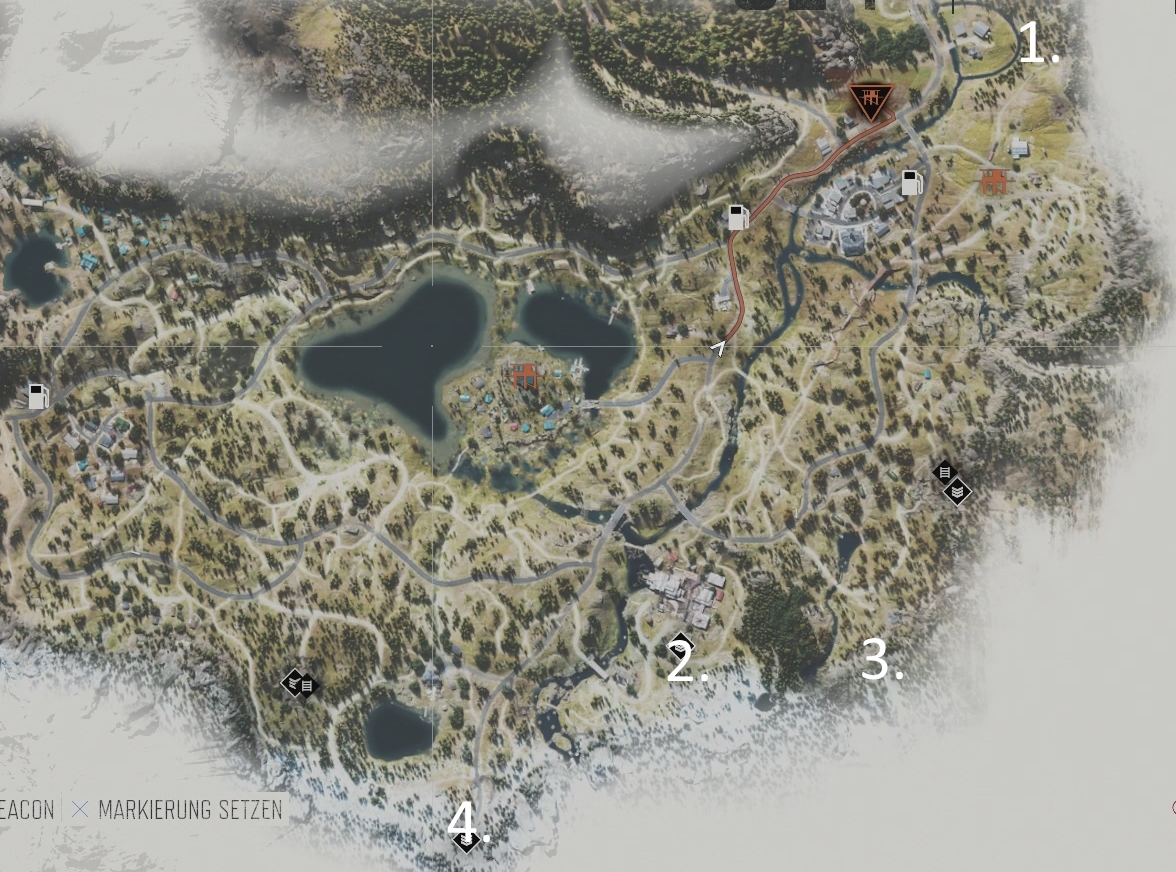
2. Days Gone: Map of Cascade
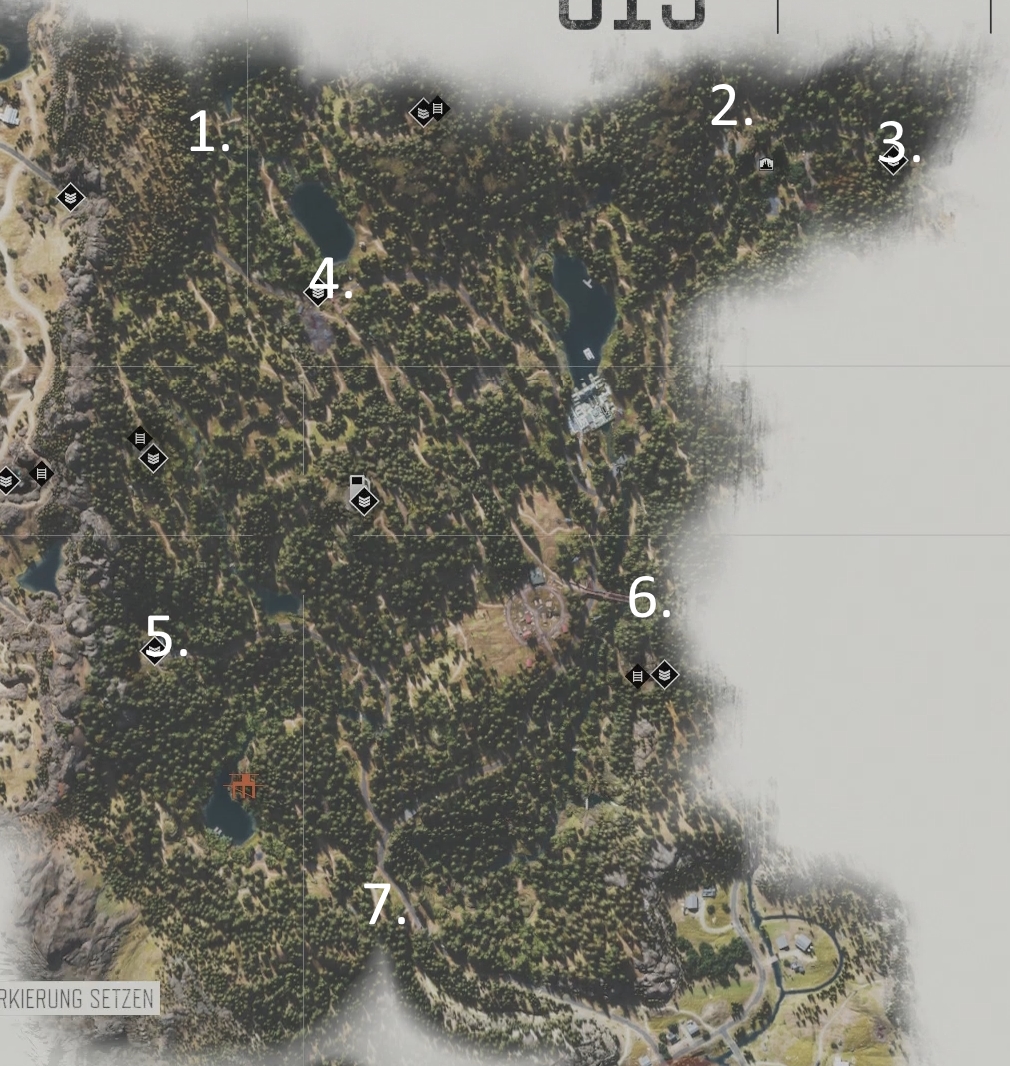
- There is a syringe in the cave - but also a horde. Come by at night and the freakers will be out.
- You will come across the cave during a story mission. Visit it again afterwards and secure the next syringe.
- This facility will show up as a side mission. Establish the power and get the upgrade.
- This facility is displayed as a side mission. Make the power and get the upgrade.
- You will find this facility at the beginning when you have to get Boozer envelopes.
- Just cross the bridge, the syringe is right in front of you in a crate.
- Jump across the small gap to the crashed helicopter. You absolutely need a nitrous injection for your motorcycle here.
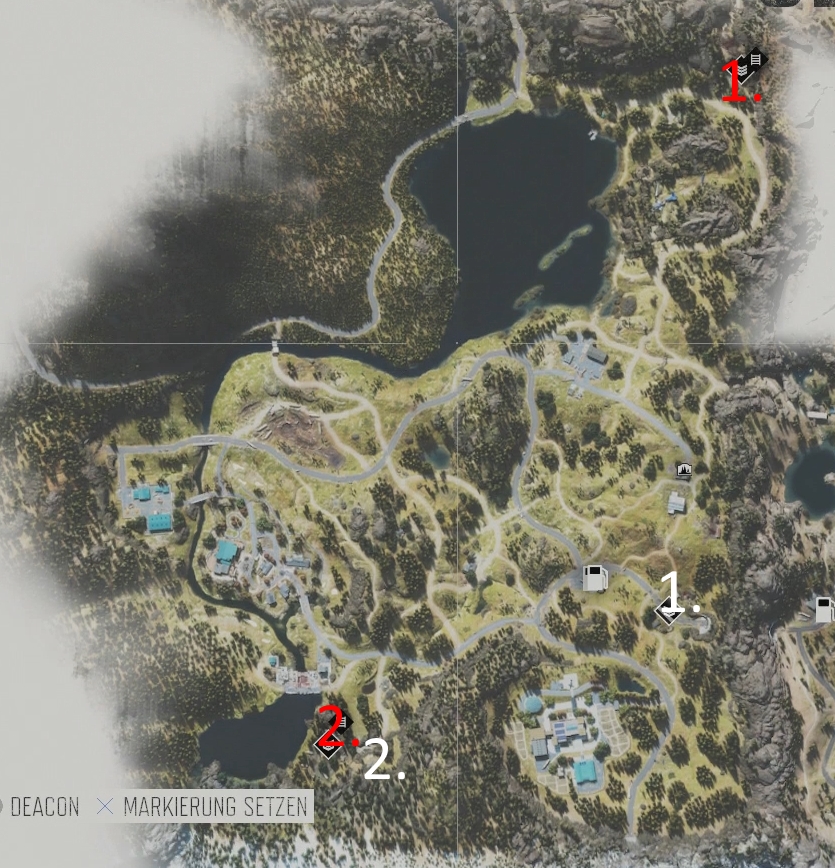
Here you can see the locations of all ambush camps at a glance.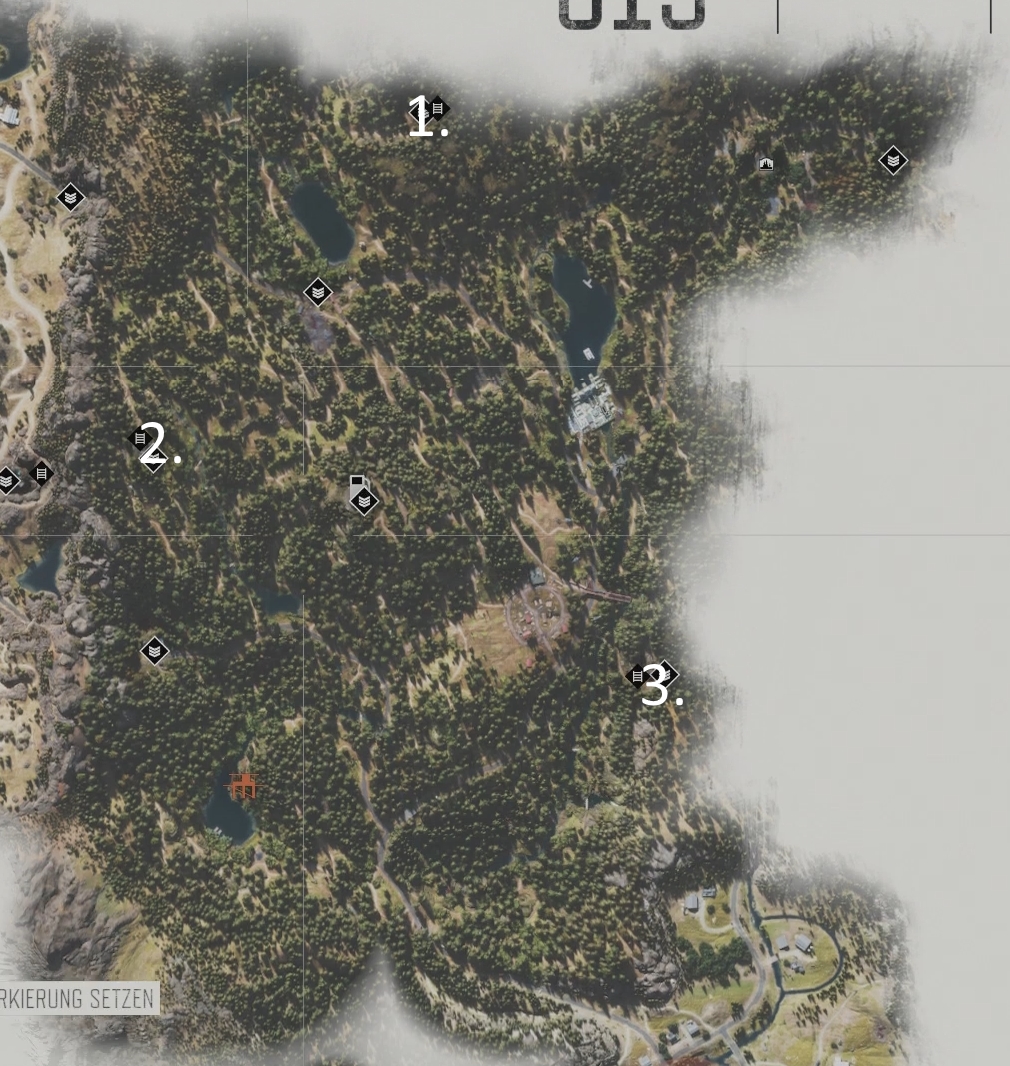
3. Days Gone: Map of Belknap
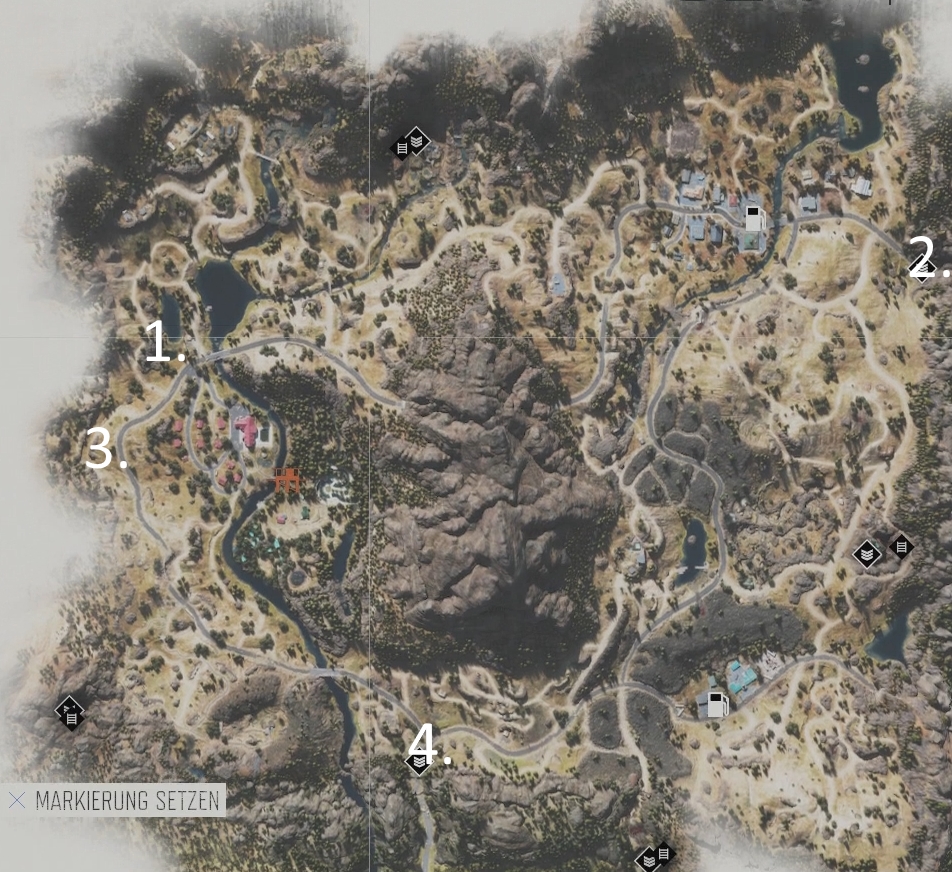
- In a cave you will find another syringe.
- This facility is shown as a side mission. Restore the power and secure the upgrade.
- Another crashed helicopter. Again, you will need the nitrous injection to jump over the chasm.
- This facility is shown as a side mission. Restore the power and secure the upgrade.
Here you can see the locations of all ambush camps at a glance.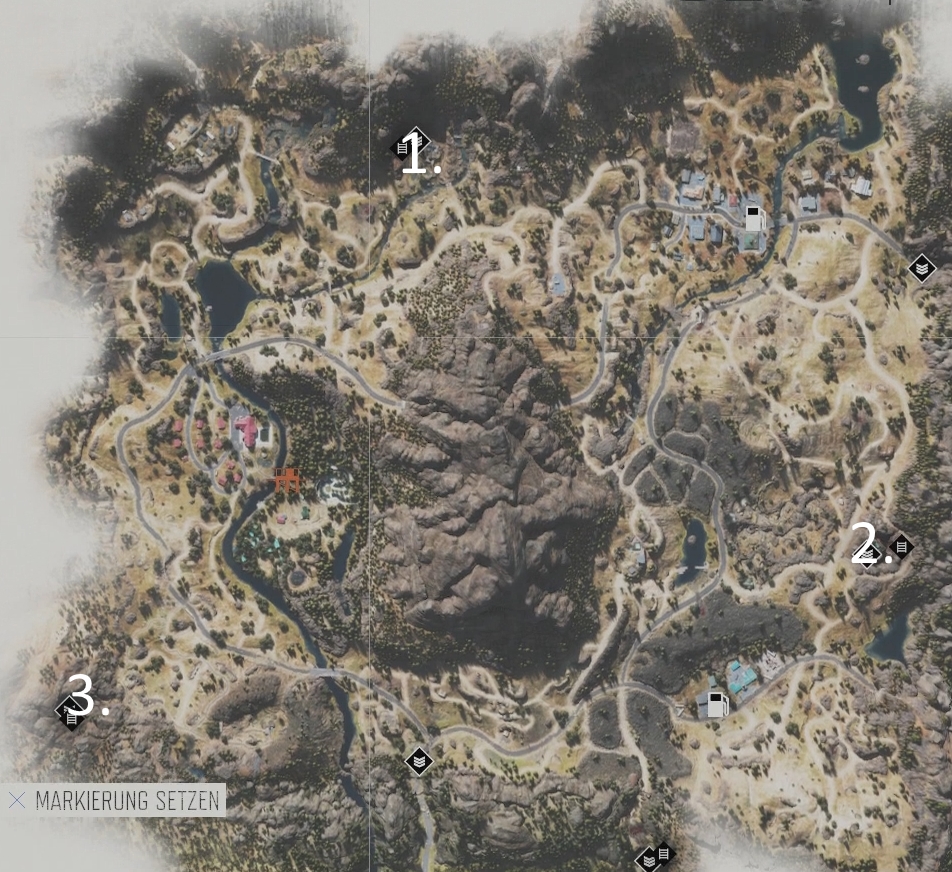
4. Days Gone: Map of Lost Lake
- Right on the mountain you will come across a syringe.
- This facility is shown as a side mission. Establish the power and secure the upgrade.
- Again, you will need the nitrous injection to jump to the next crashed helicopter.
- This facility is shown as a side mission. Restore the power and get the upgrade.
Here you can see the locations of all ambush camps at a glance.
5. Days Gone: Map of Iron Butte
Because Iron Butte has few camps and research stations to offer, both are marked here on a map. NERO facilities are white, camps are red.
- This facility is shown as a side mission. Establish power and secure the upgrade.
- Use the jump in front of the crashed helicopter to jump to it and collect the syringe.
6. Days Gone: Map of Crater Lake
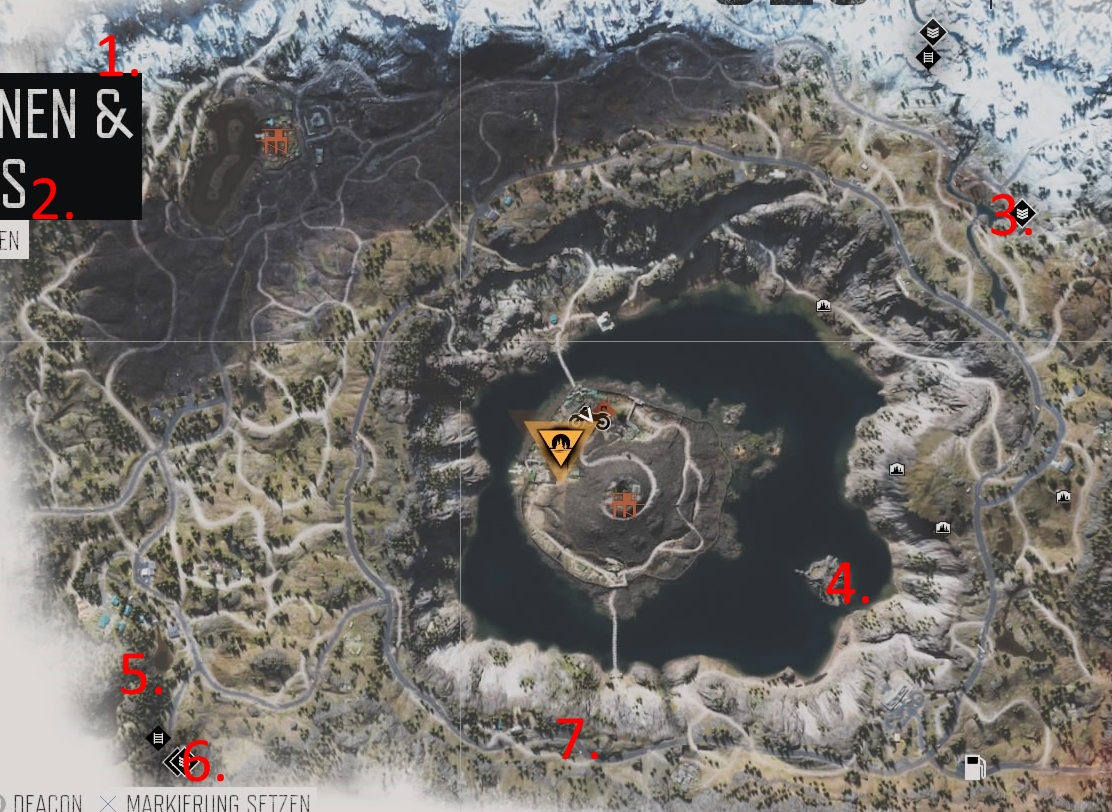
- The syringe is on the mountain. Find the cave nearby, go inside and look for a ledge to climb up. After that, follow the path.
- One of the easiest stations: Just go to the point on the map and collect the improvement.
- This facility will show up as a side mission. Establish the power and secure the upgrade.
- On the small island is your destination. Use the ramp on the beach and jump over by motorcycle.
- While you have to look for Anderson in the cave, you can also take the syringe inside.
- This facility will appear as a side mission. Establish the power and secure the upgrade.
- Look for the upgrade here in the house.
Here you can see the locations of all the ambush camps at a glance.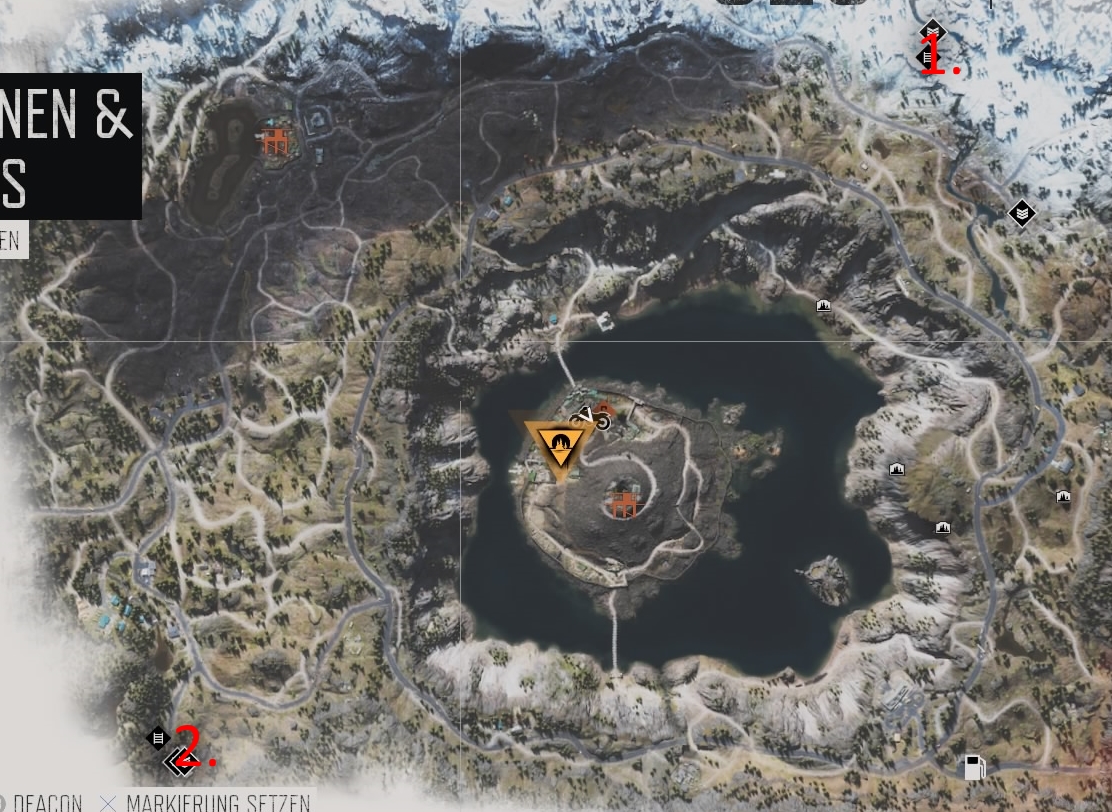
7. Days Gone: Map of Highway 97

- Just go into the cave and you'll have another upgrade.
- Investigate the cave here and grab the upgrade.
- This upgrade will show up as a side mission. Establish the power and secure the upgrade.
- Jump to the first small island and from there to the other shore. There you will find a helicopter along with a syringe.
- This equipment is displayed as a side mission. Restore the power and get the upgrade.
- Under the bridge there is another upgrade lying around.
Here you can see the locations of all ambush camps at a glance.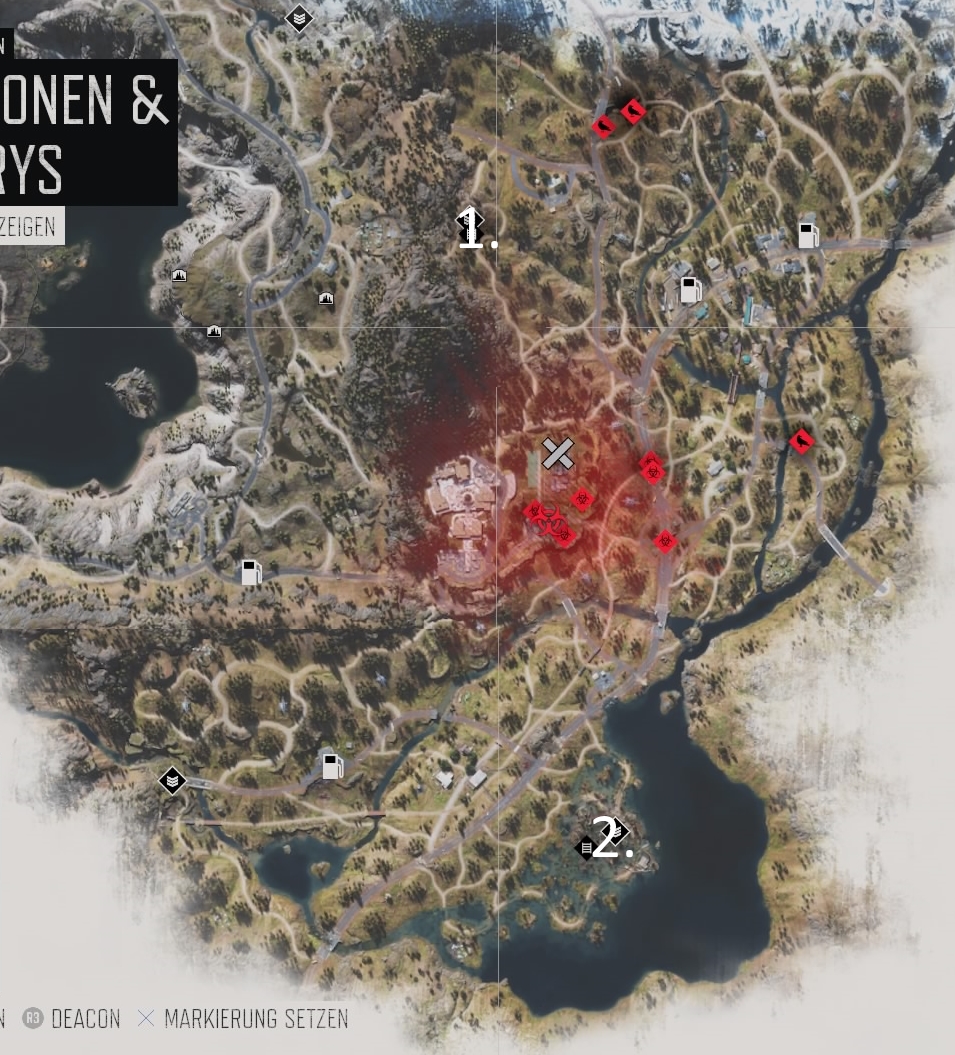
More about Days Gone
If you want to know more about Days G one, just have a look at our big overview. Or you can visit our beginnerand survival tips right now. Alternatively, we'll show you which skills you can unlock.
Visit us on Facebook and Instagram and discuss your favorite games with us.